
Tongue and Groove Flooring: Cost, Types & Install Guide
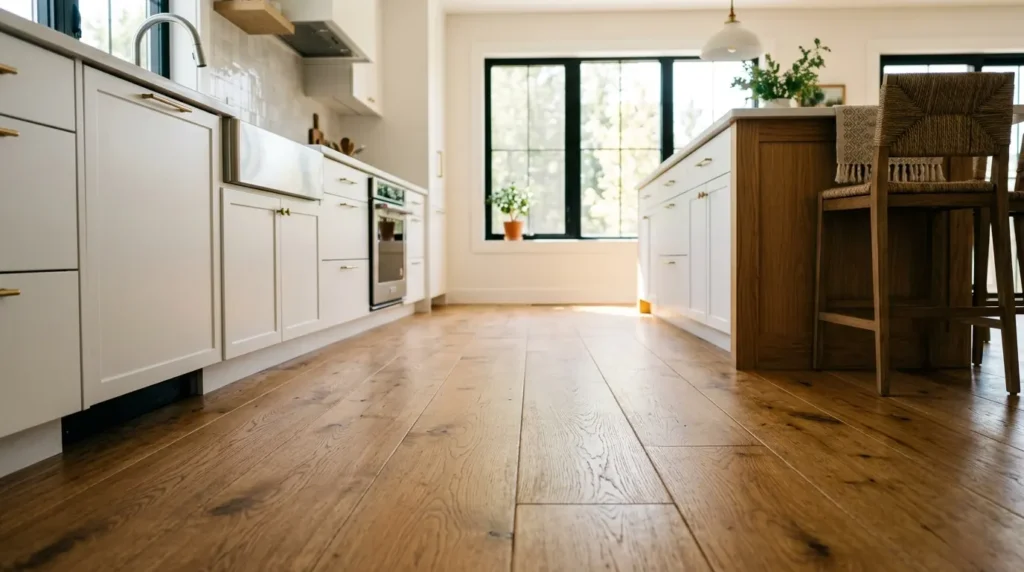
Tongue and groove flooring is the interlocking plank system that’s held wood floors together for over a century, and it’s still the standard homeowners reach for when they want a floor that looks seamless and stays put. Each plank has a protruding “tongue” on one edge and a matching “groove” on the other, so one board locks into the next and the whole floor behaves as a single, stable surface instead of loose individual planks. If you’re weighing it against click-lock options for your kitchen, hallway, or living room, here’s what actually matters: how it’s installed, what it costs, which material fits which room, and where it can go wrong.
What Is Tongue and Groove Flooring?
Tongue and groove flooring is any wood, engineered wood, laminate, or vinyl plank milled with a protruding edge (the tongue) on one side and a matching slot (the groove) on the other. During installation, the tongue of each new plank slides into the groove of the last one, locking the boards together edge to edge. That connection is what gives tongue and groove floors their tight, gap-free finish and the structural stability that lets solid hardwood versions last 75 years or more.
How Tongue and Groove Flooring Works
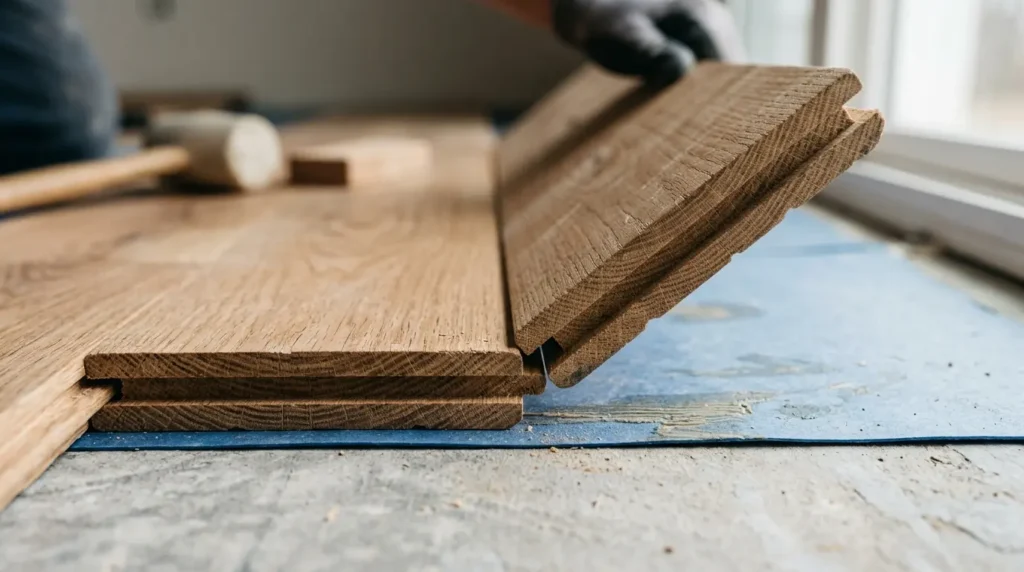
The mechanics are simple but the payoff is real. One long edge and one short end of each plank carries the tongue; the opposite long edge and end carries the groove. Fit them together and you get a floor that resists lateral shifting, stays flush across the whole surface, and hides the seams almost completely once it’s sanded and finished. Small seasonal gaps of 1/32 to 1/16 inch are normal as wood expands and contracts with humidity, and they usually close back up on their own.
Unlike modern click-lock systems, a true tongue and groove joint typically isn’t meant to be pulled apart and reused. It’s fastened by nailing, stapling, or gluing, which is part of why it’s held up as the more permanent, professional-grade option even though click-lock has become the easier DIY default for engineered and laminate products.
Types of Tongue and Groove Flooring
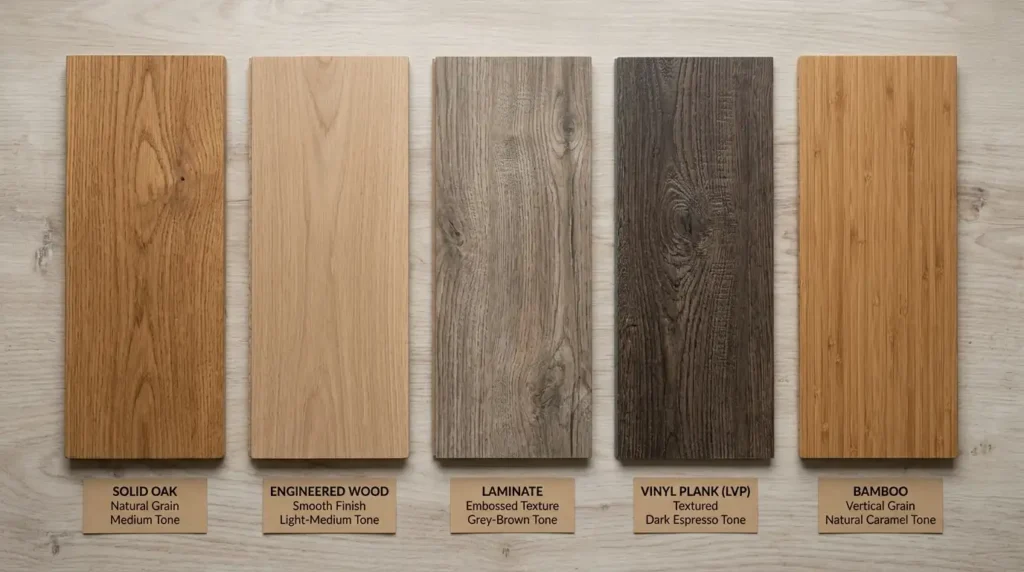
Not every tongue and groove floor is solid oak. The system shows up across nearly every plank material, and the right one depends on the room.
Solid hardwood. Oak, maple, and cherry are the classic choices, milled with grooves on one edge and tongues on the other so planks lock tight during a nail-down installation. Solid hardwood can be sanded and refinished many times over its life, but it’s the most sensitive to moisture and swings in humidity, so it’s best kept out of consistently damp rooms.
Engineered wood. A real hardwood veneer sits on top of a plywood or fiberboard core, which makes the plank far more resistant to temperature and moisture changes than solid wood. This is the version most often recommended for kitchens and basements, and it can be floated, glued, or nailed depending on the subfloor.
Laminate. A photographic wood-look layer is fused under a wear-resistant top coat using high heat and pressure. It’s budget-friendly, handles foot traffic well, and its interlocking design makes it approachable for first-time installers.
Luxury vinyl plank (LVP). Fully synthetic and genuinely waterproof, LVP with a tongue and groove or click-style edge is the safest pick for kitchens, laundry rooms, and bathrooms where standing water is a real risk.
Bamboo. A fast-growing, renewable material that mimics the look of hardwood. Strand-woven bamboo in particular holds up well to wear, though it’s still sensitive to high humidity and works best in bedrooms and living rooms rather than wet areas.
Is Tongue and Groove Flooring Good for a Kitchen?
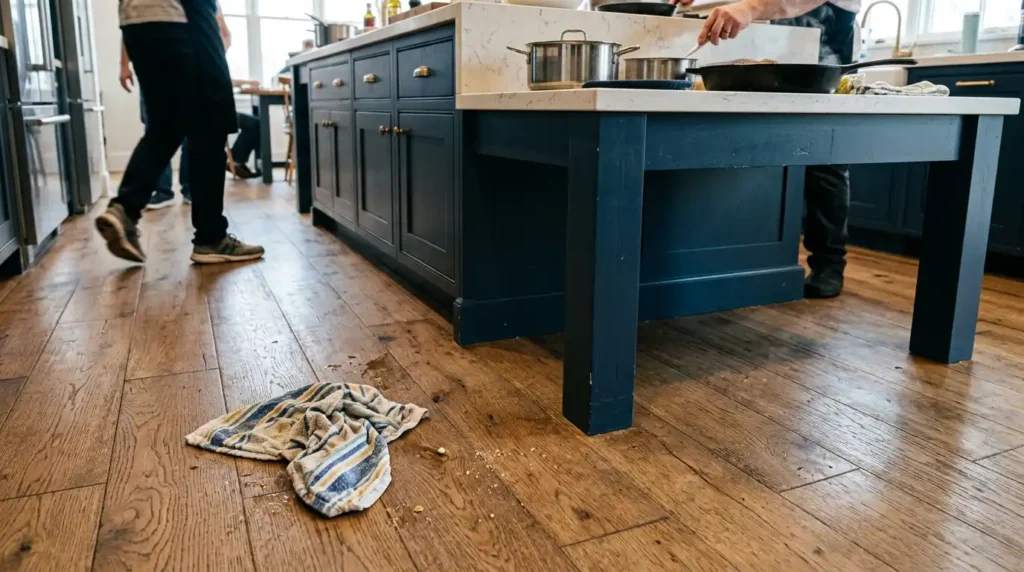
Engineered wood and luxury vinyl tongue and groove flooring both work well in kitchens; solid hardwood can too, but it needs a good finish and quick cleanup of spills to stay protected. A kitchen floor takes more punishment than almost any other room in the house between dropped pans, foot traffic, and the occasional spill left too long, so the material matters more than the joint system itself.
Engineered wood’s layered construction resists warping better than solid wood, which is exactly why it’s the most commonly recommended tongue and groove option for kitchens and other rooms with fluctuating humidity. When a tongue and groove joint is properly glued and sealed, the seams sit tight enough to shrug off everyday moisture, though the joint on its own isn’t waterproof the way a fully sealed LVP product is. If your kitchen sees a lot of standing water, spilled dog bowls, or a dishwasher that’s due for replacement, vinyl plank with a locking edge is the safer bet. If you want the warmth and refinishing options of real wood, engineered hardwood with a quality finish is the better trade-off.
Tongue and Groove vs. Click-Lock Flooring
Click-lock planks snap together with a mechanical locking mechanism and don’t require nails, staples, or glue, which makes them faster to install and easier to remove or replace later. Tongue and groove planks slide together and are then fastened down, which takes more time and skill but produces a more permanent, structurally rigid floor that’s less prone to shifting over decades of use.
For moisture resistance, the comparison depends on the product more than the joint style. Click-lock luxury vinyl and rigid-core products are usually built with water-resistant cores and tighter seams, making them a safer default for kitchens, rentals, and homes with pets or kids. A well-installed tongue and groove floor, glued and properly sealed, can hold its own against everyday spills, but it depends heavily on installation quality rather than the joint alone. If long-term stability and refinishing options matter more to you than installation speed, tongue and groove still wins for solid hardwood and premium engineered products.
How to Install Tongue and Groove Flooring
Installing tongue and groove flooring is a realistic weekend DIY project if you’re comfortable with basic tools, though larger rooms or tricky layouts around kitchen islands and cabinets add real time.
- Acclimate the planks. Let boxed flooring sit in the installation room for at least 48 hours before you touch it, so it adjusts to the room’s humidity and temperature and doesn’t expand or shrink after it’s down.
- Prep the subfloor. It needs to be clean, dry, and level. Pull baseboards, sweep thoroughly, and add a moisture barrier if you’re installing over concrete.
- Snap a chalk line and lay the first row. Set the first board against the wall with roughly a 3/16 to 1/4-inch expansion gap, groove side toward the wall, and use spacers to hold that gap as you go.
- Fasten and lock each row. Slide the groove of the next board onto the tongue of the last, tap it snug with a rubber mallet and tapping block, and nail, staple, or glue depending on your product and subfloor.
- Stagger the seams. Keep end joints at least 10 inches apart between rows so the floor doesn’t develop weak, repeating patterns.
- Finish the last row. Use a pull bar to draw tight boards against the final wall where a mallet can’t reach, then reinstall baseboards to hide the expansion gap.
Solid hardwood generally calls for a nail-down or staple-down method and more precision, while engineered wood and laminate versions are more forgiving for a first-time installer, especially with floating installations that skip fasteners entirely.
What Does Tongue and Groove Flooring Cost?
Material costs for tongue and groove flooring typically run about $2 to $12 or more per square foot depending on the wood species and quality, with pine on the low end and premium hardwood at the top. Once you add installation, total installed costs generally land between $4.50 and $16 per square foot, depending on the material and whether it’s nailed, glued, or floated.
Labor is the other half of the budget. A straightforward installation in a small to mid-sized room often takes a crew somewhere in the range of 8 to 12 hours, while larger or more complex layouts, like a kitchen with an island and multiple transitions, can run 20 hours or more. If you’re installing it yourself, you’ll save most of that labor cost but should still budget extra material for cuts and waste, generally around 10% more than your room’s exact square footage.
Choosing the Right Tongue and Groove Flooring for Your Home
Start with the room, not the look. A kitchen or bathroom calls for engineered wood or vinyl over solid hardwood. A living room or bedroom with stable humidity is exactly where solid hardwood or bamboo can shine and be refinished for decades. From there, weigh your budget against how long you want the floor to last, and factor in whether you’re installing it yourself or hiring it out, since materials like laminate and vinyl are built for easier DIY work while solid hardwood generally rewards professional installation.
Whatever material you land on, the tongue and groove system itself has earned its reputation the old-fashioned way: it’s been locking floors together for well over a hundred years because it works.
Common Problems and How to Avoid Them
Squeaky floors. Usually the result of an uneven subfloor or fasteners that missed the joists. Leveling the subfloor before installation is the fix, not something to patch after the fact.
Gaps between boards. Small seasonal gaps are normal, but persistent or large gaps often mean the flooring wasn’t acclimated long enough before installation, or the room’s humidity swings too widely for the material chosen.
Cupping or warping. A sign of moisture getting under or into the boards. Test concrete subfloors for moisture before installing, and lean toward engineered wood or vinyl in rooms where spills and humidity are a given.
Loose staples over time. Common with staple-down installations if lower-quality staples were used. Coated, chisel-point flooring staples sized correctly for the plank thickness hold up far better long-term.

Pingback: Cost to Install Septic Tank and Leach Field (2026)
Pingback: Barn Door Hardware Kit: How to Choose the Right One
Pingback: refinish hardwood floors cost in 2026 (Full Guide)