
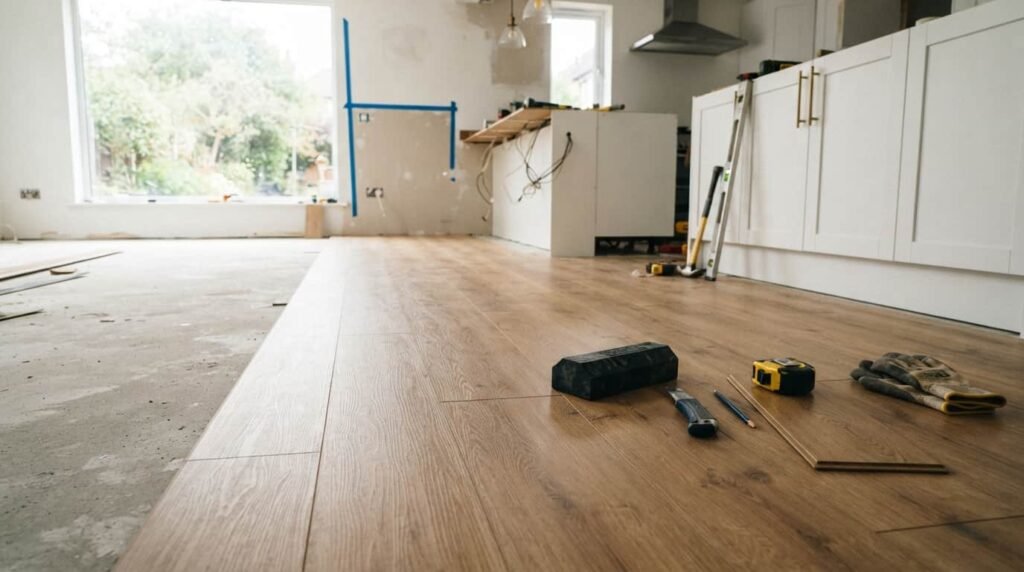
How to Lay Vinyl Plank Flooring in a Kitchen, Step by Step
If you’re wondering how to lay vinyl plank flooring in your own kitchen, the short version is this: prep the subfloor, plan your layout, click or glue the planks into place row by row, and leave room for the floor to expand. That’s the whole job in one sentence. The rest of this guide walks through every step in the order I did it in my own kitchen, plus the mistakes that turn a weekend project into a two-week headache.
Vinyl plank has become the default flooring choice for kitchens because it shrugs off spilled coffee, dropped pans, and the general chaos of a room where people actually cook. It looks like hardwood, costs a fraction of the price, and most versions are fully waterproof. But the install still has to be done right, or you’ll be looking at gaps, peaking seams, or a floor that rattles underfoot within a year.
What You’ll Need: Tools and Materials
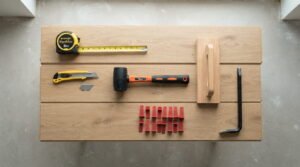
Before you touch a single plank, gather what the job actually requires. Most vinyl plank installs are DIY-friendly precisely because the tool list is short:
- Vinyl plank flooring (buy 10 to 20 percent extra for cuts and waste)
- Underlayment, if your planks don’t already have a pad attached
- A moisture barrier, if you’re installing over concrete
- Utility knife and a straightedge or speed square
- Tape measure and a pencil or chalk line
- Tapping block and rubber mallet
- Pull bar for the last row against the wall
- ¼ to ⅜ inch spacers (check your manufacturer’s spec)
- Pry bar, if you’re removing baseboards
- Knee pads (you’ll thank yourself later)
If you’re going with glue-down planks, add a notched trowel and the manufacturer-recommended adhesive to that list. Click-lock and peel-and-stick, or GripStrip, planks skip the glue entirely and create what’s called a floating floor, meaning the flooring rests on top of the subfloor rather than bonding to it.
Prepping Your Kitchen Subfloor

This is the step people skip, and it’s the one that decides whether your floor looks great in year one or starts showing every bump in the concrete by year two.
Start by clearing the room completely, including appliances that can be reasonably moved. Remove the baseboards with a pry bar and set them aside; you’ll reinstall them once the flooring is down. Pull up any old carpet or vinyl. If you’re dealing with old sheet vinyl that might contain asbestos, don’t sand it. Have it professionally removed instead.
Once the subfloor is bare, check that it’s clean, rigid, level, and free of cracks. A self-leveling compound handles low spots, and a floor grinder takes care of high ones. Vacuum thoroughly afterward. Even small debris left under a plank telegraphs through the surface over time and creates a visible bump.
If your kitchen sits on a concrete slab, this is also where you decide on a moisture barrier. Concrete wicks moisture up from the ground, and a vapor barrier keeps that dampness from reaching the back of your planks.
Do You Need Underlayment for Vinyl Plank Flooring?
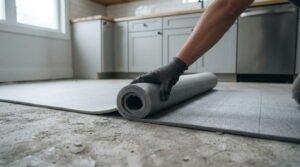
Quick answer: if your planks already have a pad attached to the back, you don’t need a separate underlayment. If they don’t, add one, especially over concrete, where it also protects against moisture and takes the chill out of the floor.
Beyond moisture protection, underlayment adds sound dampening and a bit of cushioning underfoot, which matters in a kitchen where you’re standing for long stretches while cooking. Glue-down and peel-and-stick installations generally skip underlayment altogether since the plank bonds directly to the subfloor. Whatever you choose, keep it thin and dense. A thick, soft pad under a click-lock floor puts stress on the locking joints and can void your warranty.
How to Lay Vinyl Plank Flooring, Step by Step
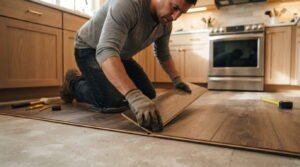
With the subfloor prepped, it’s time to actually install. Here’s how the process breaks down for the most common method, click-lock flooring.
- Plan your starting row. Measure the width of the room and divide it by the width of one plank. If the last row would end up narrower than half a plank, trim the first row so both edges look balanced. Working from left to right along the longest, straightest wall usually gives the cleanest result.
- Mix your boxes. Open several boxes at once and shuffle planks together before you start. Dye lots vary slightly between boxes, and blending them prevents obvious color patches across the floor.
- Set your spacers. Place spacers against the starting wall to hold the manufacturer’s recommended expansion gap, typically ¼ to ⅜ inch. Vinyl expands and contracts with temperature, and skipping this gap is one of the fastest ways to end up with buckled seams later.
- Lay the first plank. Trim the tongue edge off the first plank so it sits flush against the wall, then set it in the corner.
- Snap the second plank into place. Hold it at a slight angle, fit the tongue into the groove of the first plank, then lower it flat until it clicks. Continue down the row, trimming the last plank to fit and saving usable offcuts of six inches or longer for the start of the next row.
- Stagger your seams. Start each new row with a different plank length so the end joints land at least six to eight inches apart from the row before it. This staggered pattern is what makes vinyl plank read as a natural wood floor instead of a repeating tile grid.
- Tap each row snug. Use the tapping block and mallet along the seams to make sure every joint is fully locked, not just resting close together.
- Work your way across the room, cutting border planks as needed and always leaving the expansion gap along every wall.
- Pull the last row tight. A pull bar lets you snap the final row into place when there’s no room to angle a plank in by hand.
- Remove the spacers and reinstall the baseboards, nailing them to the wall rather than through the flooring so the floor can still move slightly with temperature changes.
If you’re using a glue-down method instead, the layout logic flips: you start from the center of the room using two perpendicular chalk lines rather than from a wall, spread adhesive in small sections with a notched trowel, and let it become tacky before setting the planks. Whichever method you use, finish by rolling the floor with a heavy floor roller to seat every plank fully against the subfloor or adhesive.
Cutting Planks Around Cabinets, Islands, and Appliances
Kitchens rarely offer a clean rectangle to work with, which is where most of the actual skill in this job shows up. For straight cuts, score the plank with a utility knife along a straightedge and snap it along the line, then finish the back with a second knife pass. For notches around cabinet toe kicks or door casings, trace the shape onto paper first and use that as a cutting template. A jigsaw handles curved or irregular cuts that a utility knife can’t manage cleanly.
Undercut door jambs and cabinet trim with a handsaw before you install, so the plank can slide underneath rather than being scribed around it. It’s a small step that makes the finished edge look far more professional. Around a kitchen island, plan your layout so cut edges land against cabinetry or walls where they’ll be hidden, rather than in the middle of open floor.
Common Mistakes That Ruin a Vinyl Plank Kitchen Floor
I made a couple of these myself the first time I laid vinyl plank in my own kitchen, so consider this the shortcut past my learning curve:
- Skipping the expansion gap. It’s tempting to push planks tight against cabinets and walls for a clean look, but that gap is what keeps the floor from buckling as it expands.
- Ignoring subfloor prep. A floor that looks flat to the eye can still have dips that show up under vinyl once it’s installed. Check with a level, not just a glance.
- Not staggering seams enough. Rows with end joints lined up too close together read as uneven and weaken the overall structure.
- Using the wrong underlayment. Thick foam meant for laminate can compress under a rigid vinyl core and cause the locking system to fail over time.
- Forgetting to acclimate certain products. Most modern floating luxury vinyl no longer needs it, but always check the manufacturer’s instructions since some products still do.
- Installing over laminate. Laminate flooring can be uneven and isn’t a recommended base for vinyl plank, unlike concrete, plywood, tile, or existing vinyl.
Frequently Asked Questions
Is vinyl plank flooring good for a kitchen?
Yes. Most vinyl plank flooring is waterproof or highly water-resistant, which matters in a room that sees regular spills. It’s also softer underfoot than tile, dent-resistant against dropped cookware, and easy to wipe clean, which is why it has become one of the most common kitchen flooring choices.
Click-lock or glue-down, which is better for a kitchen?
Click-lock is easier to install yourself and works well in most homes. Glue-down creates a more secure, permanent bond to the subfloor, which some installers prefer for very high-traffic kitchens since it’s less prone to shifting under heavy appliances or furniture over time.
How much does it cost to install vinyl plank flooring?
Material typically runs $2 to $7 per square foot for standard vinyl plank, with luxury vinyl plank reaching $3 to $10. Professional installation adds roughly $3 to $10 per square foot in labor. A DIY install with click-lock planks cuts that labor cost out almost entirely, which is a big part of why so many homeowners take the project on themselves.
How long does it take to install vinyl plank flooring?
A straightforward kitchen, once the subfloor is ready, typically takes a beginner two to four hours for a small space and a full day for a larger or more complex layout with lots of cabinet cuts. Subfloor prep, if it’s needed, adds time on top of that.
Can you install vinyl plank flooring over existing tile or vinyl?
Generally yes, as long as the existing surface is flat, clean, and structurally sound, and it’s no more than one layer of old vinyl. Laminate is the one common flooring type you should avoid installing over, since its unevenness can telegraph through the new planks.
Once the last plank is snapped into place and the baseboards are back on, vinyl plank flooring needs very little to look its best. A regular sweep, an occasional damp mop with a neutral pH cleaner, and felt pads under heavy furniture legs will keep a kitchen floor looking new for years. Take your time on the prep work, get the first row straight, and the rest of the install tends to go a lot faster than people expect.

Pingback: Tongue and Groove Flooring: Cost, Types & Install Guide