
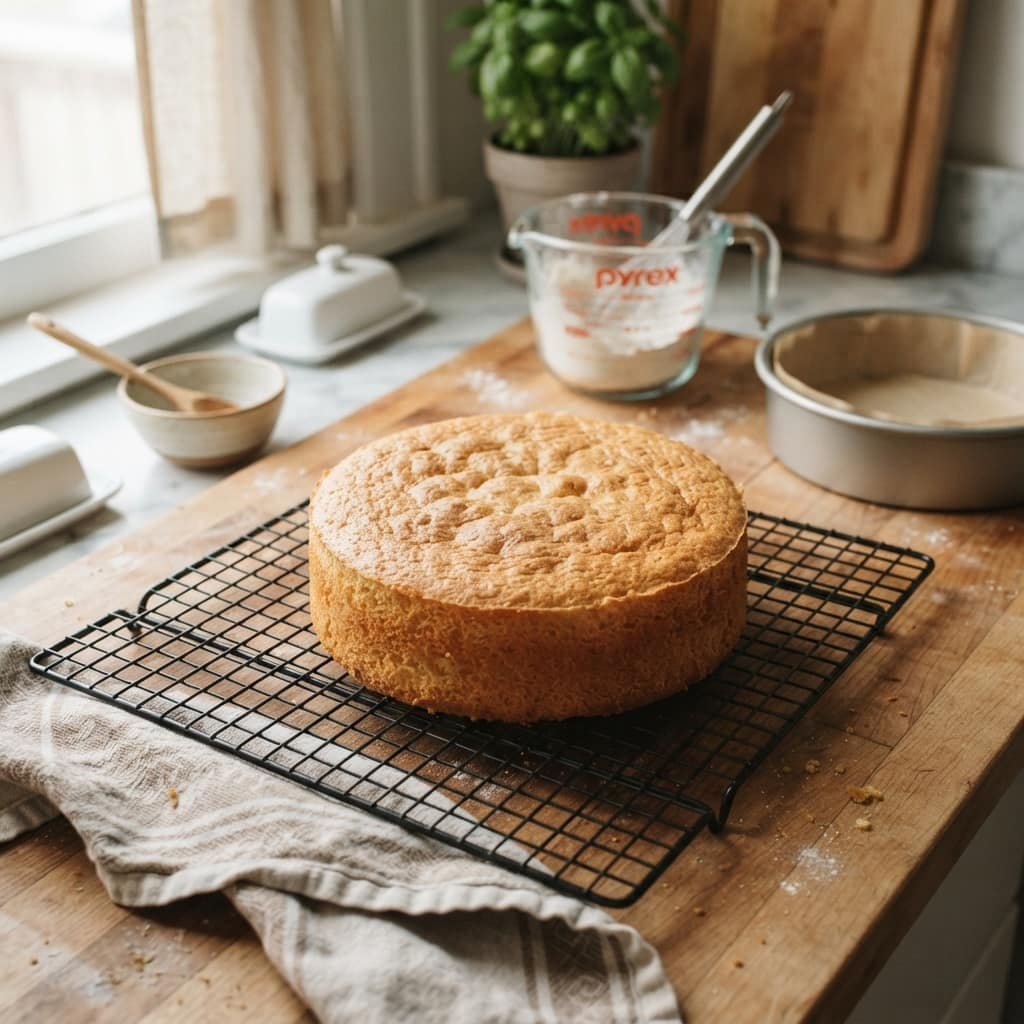
8-Inch Round Cake: The Complete Baking Guide
An 8-inch round cake is one of the most useful sizes for home baking. It is small enough for a family dessert but large enough for a birthday, dinner party, or simple celebration.
The problem is that cake recipes don’t always make the pan size obvious. You may wonder how much batter belongs in an 8-inch pan, how many people it will serve, or whether a recipe written for a 9-inch pan can be used without changing anything.
Those details matter. An 8-inch round pan has less surface area than a 9-inch pan, so the same amount of batter will produce a deeper cake and usually need more time to bake.
This guide covers the practical details: 8-inch round cake servings, batter capacity, baking temperature, baking time, pan conversions, layer cakes, and a straightforward vanilla recipe.
How Big Is an 8-Inch Round Cake?
An 8-inch round cake pan measures approximately 8 inches across the top. The depth can vary, with 2-inch-deep pans being especially common.
The diameter sounds small, but an 8-inch cake can be surprisingly generous when it is layered and cut carefully.
For a standard two-layer cake, an 8-inch round is a good choice for a small birthday gathering or family celebration. For a single-layer cake, expect fewer, larger slices.
The number of servings isn’t a fixed measurement because it depends on:
- Cake height
- Number of layers
- Slice size
- Whether the cake is the main dessert
- How generously the cake is cut
That last point is easy to underestimate. A cake cut into large wedges will serve far fewer people than the same cake cut into smaller party portions.
How Many People Does an 8-Inch Round Cake Serve?
A practical range for an 8-inch round cake is about 8 to 20 servings, depending largely on its height and how it is sliced.
A single-layer cake cut into generous dessert portions may provide around 8 to 10 servings.
A taller two-layer cake can provide roughly 16 to 20 party-sized servings. Smaller celebration or wedding-style portions can stretch the cake further.
For planning purposes, use this simple guide:
| Cake style | Approximate servings |
|---|---|
| Single 8-inch layer, large slices | 8–10 |
| Single 8-inch layer, smaller slices | 10–12 |
| Two 8-inch layers | 16–20 |
| Tall layered cake, small portions | 20+ |
These are planning estimates rather than guarantees. A thick buttercream layer, for example, may encourage smaller slices than a lightly frosted snack cake.
Planning a Party for 20 People
If you’re serving exactly 20 guests, an 8-inch two-layer cake can work if you cut moderate portions.
However, if you expect people to want generous slices or seconds, it is safer to provide additional dessert.
For a larger gathering, consider a 10-inch cake, cupcakes, or a second smaller cake. It is much easier to have a few extra servings than to discover halfway through the party that the last guests are getting crumbs.
How Much Batter Goes Into an 8-Inch Round Pan?
An 8-inch round cake pan that is about 2 inches deep holds roughly 7 cups of liquid to the rim.
You should not fill the pan to its full capacity. Cake batter needs room to expand as it rises.
For most standard cake batters, around 3½ to 4½ cups of batter per 8-inch layer is a useful working range, although the ideal amount depends on the recipe and how much the batter rises.
A simple rule is to fill the pan somewhere around halfway to two-thirds full rather than trying to use every available inch.
If you have more batter than fits comfortably, don’t force it into the pan. Use the extra batter for cupcakes or a small additional cake.
Why Pan Depth Matters
Two 8-inch pans can have the same diameter but different depths.
An 8-inch pan that is 1½ inches deep behaves differently from an 8-inch pan that is 3 inches deep. The deeper pan can hold more batter, but a deep layer may also require more careful baking so the center cooks before the edges become overdone.
For a standard layer cake, two matching 8-inch pans are usually easier to manage than one very deep pan.
8-Inch vs. 9-Inch Round Cake Pan
The difference between an 8-inch and 9-inch pan looks small, but the baking area changes more than you might expect.
The surface area of a round pan depends on the square of its radius. That means adding one inch to the diameter gives the 9-inch pan considerably more area.
Here’s the practical difference:
| Feature | 8-inch round | 9-inch round |
|---|---|---|
| Diameter | 8 inches | 9 inches |
| Same batter | Deeper | Shallower |
| Baking time | Usually longer | Usually shorter |
| Finished cake | Taller | Wider/flatter |
| Best use | Small layer cake | Larger layer cake |
If you pour the exact same amount of batter into both pans, the 8-inch cake will be deeper.
That matters because the heat has farther to travel into the center. The edges may be completely baked while the middle still needs more time.
Can You Use a 9-Inch Pan Instead?
Yes, but expect a flatter cake.
If a recipe was designed for an 8-inch pan and you put the same batter into a 9-inch pan, don’t rely blindly on the original baking time. Begin checking the cake earlier because the shallower layer will generally bake faster.
If the recipe specifically calls for an 8-inch pan and you want the same height in a 9-inch pan, you’ll need more batter rather than simply changing pans.
How Long Do You Bake an 8-Inch Round Cake?
A typical 8-inch vanilla cake baked at 350°F (175°C) may take around 28 to 35 minutes.
That’s a useful starting point, not a universal rule.
Chocolate cakes, sponge cakes, butter cakes, pound cakes, and cakes containing fruit can all behave differently. The amount of batter and the color and material of the pan can also affect baking time.
Start checking toward the lower end of the expected range rather than opening the oven repeatedly.
How to Tell When the Cake Is Done
Use more than one sign.
Insert a toothpick or thin skewer into the center. It should come out clean or with a few moist crumbs. Wet batter means the cake needs more time.
You can also gently press the center with a fingertip. A properly baked cake should spring back rather than remain visibly sunken.
The edges may begin to pull slightly away from the sides of the pan, although this shouldn’t be your only test.
If you have an instant-read thermometer, the internal temperature can provide another useful check, but the toothpick and visual signs are perfectly practical for most home baking.
Easy Vanilla 8-Inch Round Cake Recipe
This recipe makes one substantial 8-inch round cake layer. It can be served as a single cake or split horizontally after cooling and filled with frosting for a smaller two-layer-style cake.
Ingredients
- 1½ cups all-purpose flour
- 1½ teaspoons baking powder
- ¼ teaspoon salt
- ½ cup unsalted butter, softened
- 1 cup granulated sugar
- 2 large eggs
- 1 teaspoon vanilla extract
- ½ cup whole milk
Before You Start
Bring the butter and eggs to room temperature if possible.
Soft butter blends more easily with sugar, and room-temperature eggs incorporate more smoothly into the batter.
Grease the sides of an 8-inch round pan and line the bottom with parchment. The parchment is particularly helpful when you’re planning to turn the cake out of the pan after baking.
Step 1: Prepare the Oven and Pan
Preheat the oven to 350°F (175°C).
Grease the pan and place a round piece of parchment on the bottom.
If you don’t have parchment, grease and lightly flour the pan instead.
Step 2: Mix the Dry Ingredients
Whisk together the flour, baking powder, and salt in a bowl.
Breaking up lumps now is easier than trying to eliminate them after the wet ingredients have been added.
Step 3: Cream the Butter and Sugar
Beat the softened butter and sugar together until the mixture becomes lighter and fluffy.
This usually takes several minutes with an electric mixer.
Don’t rush this stage. The creaming process helps incorporate air into the mixture, which contributes to the cake’s texture.
Step 4: Add the Eggs and Vanilla
Add the eggs one at a time, mixing after each addition.
Then add the vanilla.
If the mixture looks slightly curdled at this point, don’t panic. The batter can still come together once the dry ingredients are added.
Step 5: Combine the Milk and Flour Mixture
Add the dry ingredients in portions, alternating them with the milk.
Begin and finish with the dry ingredients.
Mix only until everything is combined. Once flour is added, excessive mixing can make the finished cake less tender.
Step 6: Fill the Pan
Scrape the batter into the prepared 8-inch pan and spread it evenly.
The surface doesn’t have to be perfectly flat, but smoothing it helps the cake bake more evenly.
Give the pan a gentle tap on the counter if you see large air pockets.
Step 7: Bake
Place the pan on the middle rack of the preheated oven.
Bake for approximately 30 to 33 minutes, then test the center.
If the toothpick comes out with wet batter, continue baking for a few minutes and check again.
Avoid opening the oven repeatedly during the early part of baking. Every unnecessary door opening can cause the oven temperature to drop.
Step 8: Cool Properly
Let the cake sit in the pan for about 10 minutes.
Then carefully loosen the edges, turn the cake onto a wire rack, remove the parchment, and let it cool completely.
Don’t frost it while it’s still warm. Buttercream can soften or melt against a warm cake, making an otherwise easy decorating job unnecessarily difficult.
How to Make an 8-Inch Cake Taller
If you want a tall celebration cake, don’t simply overfill one pan.
The better approach is to bake multiple layers.
For example, two separate 8-inch layers can be stacked with buttercream, cream cheese frosting, ganache, or another filling between them.
For an even taller cake, use three thinner layers.
This gives you much more control over the finished height and makes it easier to bake the centers properly.
A cake strip around the outside of the pan can also help reduce excessive doming by slowing the edges as they bake. If the cake still develops a dome, let it cool completely and carefully level the top with a serrated knife before stacking.
How to Get an Even Cake Layer
A perfectly level cake isn’t necessary for good flavor, but it makes decorating much easier.
One common problem is an 8-inch cake that rises high in the middle while the edges remain lower.
Several factors can contribute to this, including oven temperature, batter consistency, and how quickly the outside of the cake sets.
For more even layers:
- Spread the batter evenly before baking.
- Use the middle oven rack.
- Avoid an excessively hot oven.
- Consider cake strips if doming is a recurring problem.
- Cool the cake fully before trimming it.
- Use a long serrated knife and rotate the cake as you level it.
Don’t cut away a large amount of cake just to chase a perfectly flat top. A small dome can often be handled with a thin trim.
What Happens If You Put Too Much Batter in the Pan?
Overfilling is one of the easiest mistakes to make when working with a smaller cake pan.
As the batter rises, it can spill over the sides and create a mess in the oven. Even if it doesn’t overflow, a very full pan can leave you with an underbaked center and heavily browned edges.
If your recipe makes more batter than your 8-inch pan can safely hold, use the extra batter for cupcakes.
This is also a good way to learn your particular pan. After making the same recipe a few times, you’ll know exactly how high the batter should sit before it goes into the oven.
Can You Double an 8-Inch Cake Recipe?
You can double the ingredients, but the important question is where that extra batter will go.
Two batches of an 8-inch recipe do not automatically fit into one larger pan. Pan volume varies significantly with diameter, depth, and shape.
If you double the recipe, consider making:
- Two 8-inch cakes
- A taller layer cake using multiple pans
- One larger cake in an appropriately sized pan
- A cake plus cupcakes
Don’t fill a larger pan based only on diameter. Compare the actual pan capacity and remember that cake batter needs headroom for rising.
How to Convert an 8-Inch Round Cake to Another Pan
Pan conversion is easier when you think about area and depth, not just diameter.
An 8-inch round pan has a baking area of roughly 50 square inches. A 9-inch round has about 64 square inches.
That’s why the 9-inch pan spreads the same amount of batter more thinly.
When changing pans, consider three things:
1. Batter depth: Will the new pan make the layer thinner or thicker?
2. Baking time: A thinner layer usually finishes sooner, while a deeper layer may need more time.
3. Recipe quantity: If you want the same cake height, you may need to adjust the amount of batter.
For a casual home bake, it is often safer to use a pan close to the recipe’s recommended size rather than making a complicated conversion.
Should You Use Glass, Metal, or Dark Nonstick?
The material of your pan can affect how quickly the cake’s exterior browns.
Light-colored metal pans are a reliable choice for many cakes because they heat predictably.
Dark pans can encourage more browning around the edges, so you may need to watch the cake carefully.
Glass can also behave differently from metal and may require adjustments depending on the recipe.
If you’re following a recipe that was developed specifically for a certain type of pan, sticking with a similar material gives you the best chance of matching the expected result.
Common 8-Inch Cake Problems and Quick Fixes
The Center Is Still Wet
The cake probably needs more baking time. Return it to the oven for a few minutes and test again.
If the edges are becoming too dark while the center remains wet, check your oven temperature and make sure the pan isn’t positioned too close to a heating element.
The Cake Sank in the Middle
A cake can sink because the center wasn’t fully set, the oven temperature was too low, or the oven door was opened too early.
Make sure your baking powder is fresh and avoid repeatedly checking the cake during the first part of baking.
The Cake Is Dry
Overbaking is a common culprit.
An 8-inch cake is relatively small, so a few extra minutes can make a noticeable difference. Start checking as soon as the cake is close to the recipe’s expected baking time.
Measuring flour incorrectly can also contribute to a dry cake. If possible, weigh your flour rather than packing it into a measuring cup.
The Cake Stuck to the Pan
Let the cake cool for around 10 minutes before turning it out, and prepare the pan properly before baking.
Parchment on the bottom is a simple precaution that saves a lot of frustration.
The Cake Has a Large Dome
Check the oven temperature first. An oven that runs hotter than expected can cause the outside to set quickly while the center continues rising.
Cake strips can help, and leveling the cooled cake is always an option.
How to Store an 8-Inch Cake
Storage depends on the type of cake and frosting.
A plain unfrosted cake can generally be wrapped well and kept at room temperature for short-term storage, provided the recipe doesn’t contain ingredients requiring refrigeration.
Cakes with perishable fillings or frostings should be refrigerated.
If you’re making the cake ahead of time, wrap the cooled layers securely so they don’t dry out. For longer storage, cake layers can be frozen well wrapped and then thawed before decorating.
A useful decorating trick is to work with a completely cooled cake. Some bakers even chill the layers briefly before trimming and frosting because firmer cake is easier to handle.
What Frosting Works Best With an 8-Inch Cake?
Almost any frosting works, but the amount you need depends on whether you’re covering a single layer or building a stacked cake.
Good choices include:
- Vanilla buttercream
- Chocolate buttercream
- Cream cheese frosting
- Chocolate ganache
- Whipped frosting
- Strawberry or other fruit fillings paired with buttercream
For a two-layer cake, don’t forget the filling between the layers when estimating how much frosting you’ll need.
A simple cake doesn’t need elaborate decoration. A smooth layer of buttercream with fresh fruit, chocolate shavings, or a light dusting of powdered sugar can look finished without requiring advanced decorating skills.
Final Thoughts
An 8-inch round cake is a practical size to keep in your baking rotation. It works especially well for small celebrations, family desserts, and layer cakes without requiring the quantity of batter needed for a large cake.
For the most predictable results, don’t focus only on the pan’s diameter. Pay attention to its depth, the amount of batter, the type of cake you’re making, and how the pan affects baking time.
For a standard vanilla cake, start around 350°F, expect roughly 30 minutes of baking time, and use the center of the cake—not the clock alone—to decide when it’s finished.
Once you understand those basics, an 8-inch pan becomes much easier to work with. You can confidently adjust recipes, plan servings, build layered cakes, and avoid the most common problems such as overflowing batter, dry edges, and underbaked centers
How many servings does an 8-inch round cake make?
An 8-inch round cake can serve roughly 8 to 20 people depending on its height, number of layers, and slice size. A single-layer cake usually serves fewer people than a two-layer cake.
How much batter do I need for an 8-inch cake?
For a standard 8-inch round layer, around 3½ to 4½ cups of batter is a useful general range. The exact amount depends on the recipe and pan depth.
What temperature should I bake an 8-inch round cake?
Many standard cakes bake at 350°F (175°C). Always follow the temperature specified by your particular recipe because sponge, pound, chocolate, and other cake styles may require different temperatures.
How long does an 8-inch cake take to bake?
A typical vanilla cake may take about 28 to 35 minutes at 350°F, but start checking based on the recipe rather than relying on time alone.
Can I bake a 9-inch cake recipe in an 8-inch pan?
You may be able to, but don’t simply pour all the batter into the smaller pan. An 8-inch pan holds less batter than a 9-inch pan of the same depth, so excess batter can cause overflow.
Can I use an 8-inch pan instead of a 9-inch pan?
Yes, but the cake will generally be deeper if you use the same amount of batter. Because the deeper layer takes longer to bake, begin checking for doneness later than you would for the shallower 9-inch version.
How many layers can I make with an 8-inch cake?
You can make two or three layers depending on the recipe and how much batter you have. For consistent results, divide the batter evenly between matching pans.
Should I grease an 8-inch cake pan?
Yes. Grease the pan and line the bottom with parchment for easy release. If parchment isn’t available, grease and lightly flour the pan.
Why does my 8-inch cake rise in the middle?
A domed center can result from the outer edges setting faster than the middle. Oven temperature, pan material, batter quantity, and the recipe itself can all affect the shape. Cake strips may help produce a more even rise.

Pingback: Where to Buy Cherry Chip Cake Mix in 2026 (Best Options)