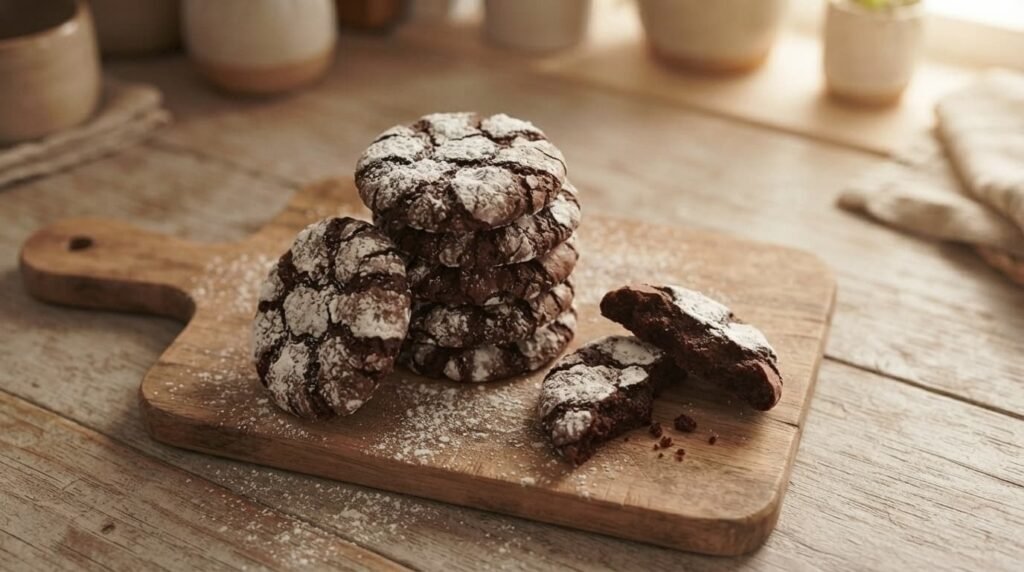
Chocolate Crinkle Cookie Recipe
A good chocolate crinkle cookie should have two things going for it: a soft, brownie-like center and a deeply cracked powdered-sugar top. If yours spread flat, lost the white coating, or came out dry, the problem usually starts before the cookies ever reach the oven. The dough needs the right balance of moisture, flour, cocoa, and chilling time, and the coating needs to be thick enough to survive baking. Once those details are handled, this chocolate crinkle cookie recipe is surprisingly straightforward and uses ordinary pantry ingredients.
These cookies are a useful recipe to keep around because they work for holiday baking, cookie exchanges, school events, or simply a weekend chocolate craving. You do not need melted chocolate, a stand mixer, or complicated decorating techniques. The distinctive appearance comes from the dough itself and the way it behaves in a hot oven.
What Makes Chocolate Crinkle Cookies Different?
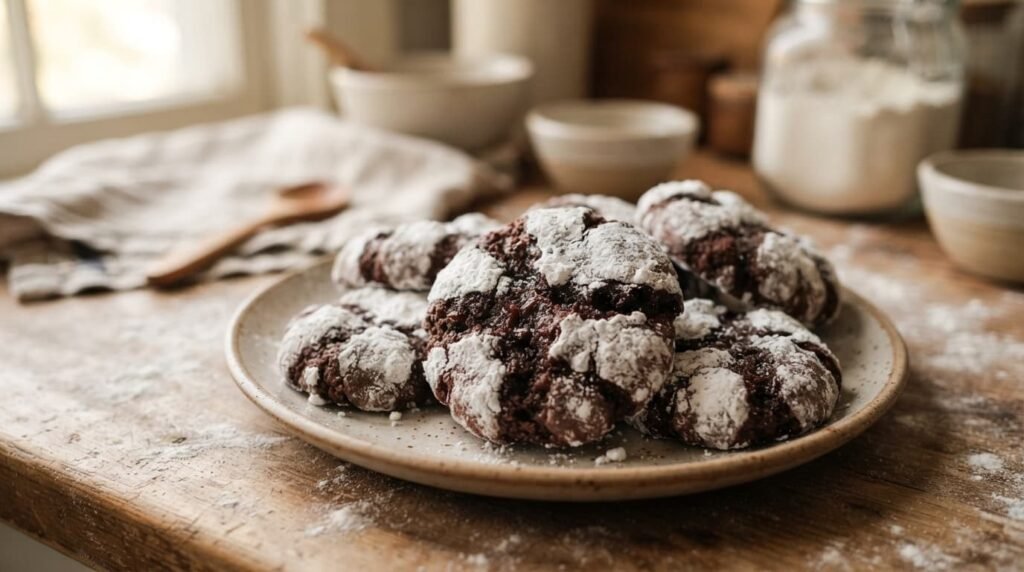
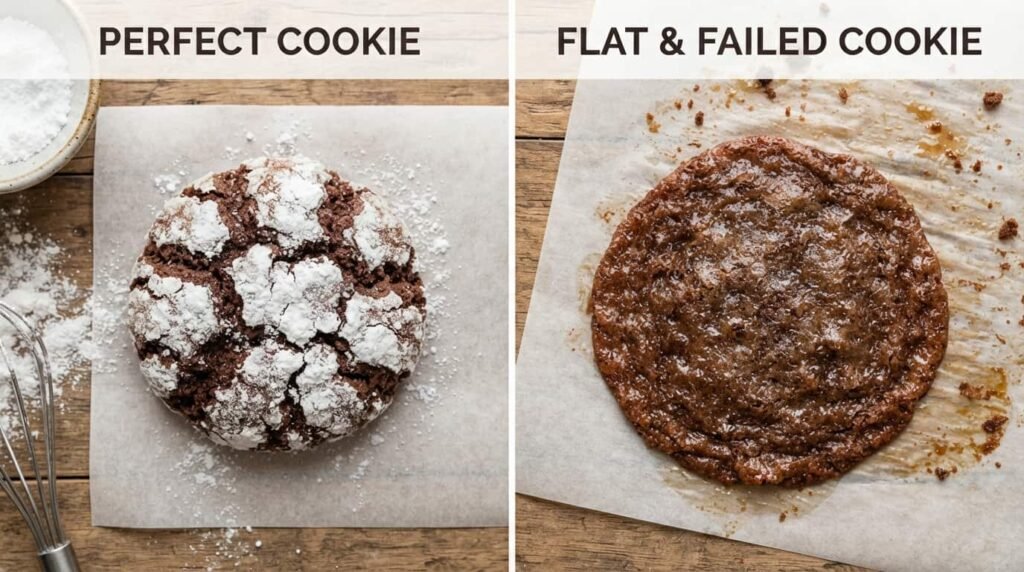
Chocolate crinkle cookies are soft chocolate cookies coated in powdered sugar before baking. During baking, the dough expands while the outer coating begins to set. The expanding cookie pushes through the sugar layer, producing the irregular white cracks that give the cookies their name.
Texture is where these cookies really stand apart. They are not meant to be crisp like a thin chocolate wafer. A well-baked cookie has a tender, fudgy middle with slightly firmer edges. Think of the texture as somewhere between a soft cookie and a brownie.
You may also see them called chocolate crackle cookies. The names are commonly used for the same general style of cookie.
One useful detail is that the cracks are not created by cutting or shaping the surface. They happen naturally during baking. That means the quality of your cracks depends heavily on dough temperature, coating, oven temperature, and how much the cookies rise.
Ingredients You Need
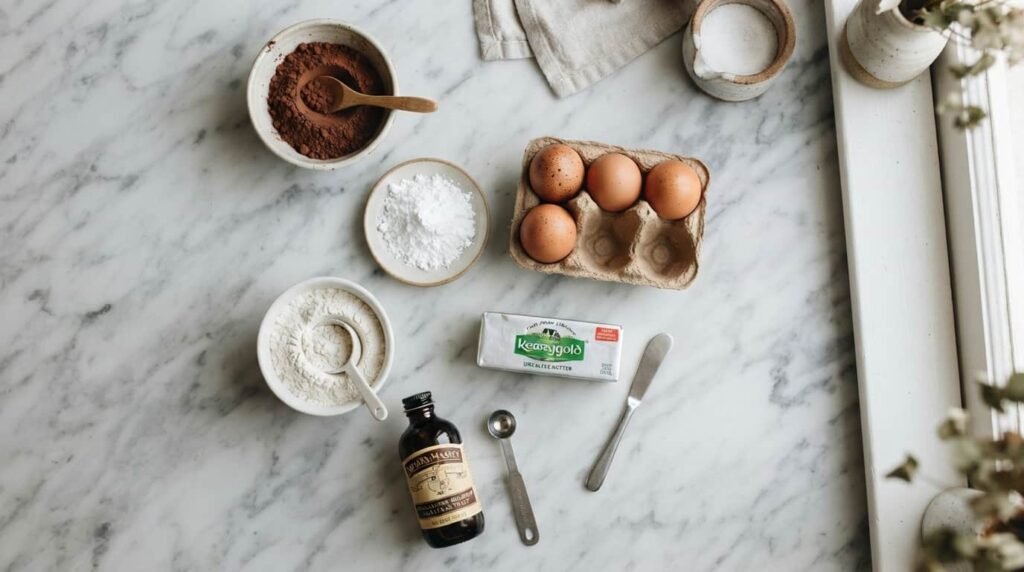
The ingredient list is simple, but each ingredient has a job.
Cocoa powder
Use unsweetened cocoa powder. Natural cocoa powder gives a more traditional chocolate flavor, while Dutch-process cocoa generally has a darker color and smoother flavor. If changing the cocoa type, avoid making other major recipe changes at the same time so you can see how the substitution affects the result.
Granulated sugar
Sugar sweetens the dough and contributes to its soft texture. It also helps create the contrast between the dark cookie and white powdered-sugar coating.
Neutral oil
Vegetable, canola, or another neutral-flavored oil works well. Oil keeps the cookie tender and gives it a moist, dense texture.
Eggs
Eggs provide structure and help bind the ingredients. Letting them come closer to room temperature before mixing can make incorporation easier.
Vanilla extract
Vanilla does not make the cookie taste like vanilla. Instead, it rounds out the chocolate flavor.
All-purpose flour
Flour gives the dough enough structure to hold its shape. Measure it carefully. Adding significantly more flour than needed can turn a soft chocolate cookie into a dry one.
Baking powder
Baking powder provides lift. That lift matters because the dough needs to expand in the oven to create the characteristic cracks.
Salt
A small amount of salt balances the sweetness and keeps the chocolate flavor from tasting flat.
Powdered sugar
This is the finishing layer that creates the snowy appearance. Use enough to give each dough ball a generous coating rather than applying a barely visible dusting.
How to Make the Chocolate Crinkle Cookie Dough
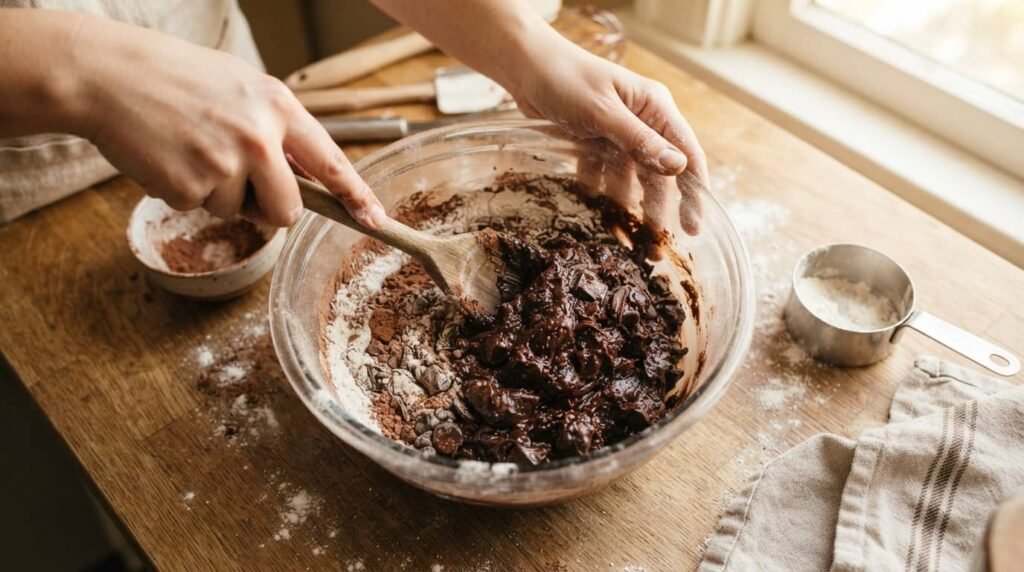
The process is easier when you think of it in three stages: build the chocolate dough, chill it thoroughly, then coat and bake.
1. Combine the cocoa, sugar, and oil
In a large mixing bowl, combine the granulated sugar, cocoa powder, and neutral oil. Mix until the ingredients are evenly blended and the mixture looks smooth.
Add the eggs one at a time, mixing after each addition. Stir in the vanilla.
Do not worry if the mixture looks thick and very chocolatey at this stage. The flour will turn it into a scoopable dough.
2. Mix the dry ingredients separately
Whisk together the all-purpose flour, baking powder, and salt in another bowl.
Adding the dry ingredients separately helps distribute the baking powder and salt throughout the flour before they reach the wet mixture.
Add the dry mixture to the chocolate mixture and stir only until the flour disappears.
This is one place where restraint helps. You do not need to keep mixing once the dough is combined. Excessive mixing can make the finished cookies less tender.
3. Chill the dough
Cover the bowl and refrigerate the dough for at least 3 to 4 hours. Overnight chilling also works.
The dough will be sticky before chilling, and that is normal. Trying to shape it immediately makes the process messy and encourages the cookies to spread too quickly in the oven.
Chilling does more than make the dough easier to handle. It gives the mixture time to firm up so the cookies can maintain enough structure while they bake.
If you are baking for a specific occasion, this is a good recipe to prepare the dough the night before.
How to Get the Signature Cracked Top
Once the dough is chilled, scoop portions and roll them into balls roughly 1 inch across. Try to keep them similar in size so they finish baking at about the same time.
Now comes one of the most useful tricks for a strong crinkle effect.
Roll each dough ball lightly in granulated sugar first, then coat it heavily in powdered sugar.
The granulated sugar creates a thin layer around the moist dough. The powdered sugar sits on top rather than disappearing as quickly into the surface. During baking, the dough expands beneath that coating and the white layer breaks apart into visible cracks.
If you skip the granulated sugar, the cookies can still crinkle. However, the powdered sugar may absorb more moisture from the dough, leaving you with less dramatic white contrast.
Do not be shy with the powdered sugar. A generous coating is part of the visual appeal and helps create the classic snowy finish.
Baking the Cookies
Preheat the oven to 350°F (175°C). Line baking sheets with parchment paper.
Place the coated dough balls about 2 inches apart. They need room to spread.
Bake for approximately 10 to 12 minutes. The exact time depends on the size of your cookies and your oven.
Look for edges that appear set while the centers remain soft and slightly puffed. They may look underbaked when you first remove them, but that is not necessarily a problem.
Let the cookies rest on the baking sheet for several minutes before transferring them to a wire rack. The residual heat continues to set the centers.
One of the easiest mistakes is waiting until the cookies look completely firm in the oven. By that point, the centers may already be overbaked. For a fudgy texture, it is better to remove them when the middle still looks soft.
Why Didn’t My Chocolate Crinkle Cookies Crack?
This is probably the most common problem with this type of cookie, and there are several possible causes.
The dough was too warm
Warm dough spreads faster. If the dough has been sitting on the counter while you shape a large batch, the later cookies may behave differently from the first ones.
Keep most of the dough refrigerated and work with smaller portions at a time.
The dough did not chill long enough
A short chill may not firm the dough sufficiently. Give it the full 3 to 4 hours when possible.
If you are in a hurry, remember that rushing this stage can cost you more time later when sticky dough becomes difficult to roll and the baked cookies spread too much.
There was not enough powdered sugar
A light coating can disappear into the dough during baking. Coat the balls generously immediately before putting them in the oven.
The oven was not fully preheated
The cookie’s structure develops in response to heat. Putting dough into an oven that is still coming up to temperature can change how quickly it spreads and sets.
Preheat the oven completely before baking.
The baking powder is old
Baking powder loses strength over time, especially when stored in humid conditions. If your cookies consistently seem dense and fail to rise, check the freshness of the leavening.
Why Are My Chocolate Crinkle Cookies Flat?
Flat cookies usually point to a dough-temperature or ingredient-measurement issue.
Start with the chilling process. The dough should be firm enough to scoop and roll without immediately becoming greasy or excessively sticky.
Next, check your flour measurement. Too little flour can leave the dough with insufficient structure, while too much produces dry cookies. Spoon flour into a measuring cup and level it rather than packing the flour into the cup.
Also look at your baking powder. If it is no longer active, the dough may not get enough lift to create the desired texture and crackle.
Finally, avoid placing dough balls onto a hot baking sheet from a previous batch. A hot tray can cause the next batch to begin spreading before it has properly entered the oven’s baking cycle. Let the sheet cool or use a second baking sheet.
How Do You Keep the Cookies Fudgy?
The biggest factor is baking time.
Chocolate cookies can be difficult to judge because their dark color makes it harder to see browning. Instead of waiting for the entire cookie to look firm, watch the edges and center.
The edges should look set, while the middle can remain soft and slightly puffed.
Cookie size also matters. Small dough balls can finish earlier than large ones, so use a consistent scoop whenever possible.
After removing the cookies, leave them on the baking sheet for a few minutes. They will continue setting as they cool.
If your cookies repeatedly come out dry, reduce the baking time slightly in the next batch rather than immediately changing several ingredients.
Can You Add Other Flavors?
Absolutely, but keep the additions controlled.
A small amount of instant espresso powder can make the chocolate flavor taste deeper without turning the cookies into coffee cookies. Peppermint extract can create a holiday-style version.
You can also experiment with chocolate chips, but there is a trade-off. Extra chocolate pieces make the cookies richer, while too many can interfere with the shape and crackled surface.
For a first batch, I recommend making the basic version exactly as written. Once you know how the dough should look and behave, it becomes much easier to judge whether a variation needs adjustment.
A Simple Baking Workflow That Prevents Mistakes
If you are making these cookies for a gathering, organize the work instead of trying to do everything at once.
Prepare the dough earlier in the day or the night before. Keep it covered in the refrigerator.
When you are ready to bake, set up three areas: chilled dough, a bowl or plate for granulated sugar, and a bowl of powdered sugar. Line your baking sheets before you begin rolling.
Scoop several portions, roll them into balls, and coat them one at a time.
Only place as many cookies on the baking sheet as will fit with roughly 2 inches of space between them.
Bake one test batch first if your oven is unfamiliar. Check the texture and spread before committing the rest of the dough.
That small test can save an entire batch, especially when using a different oven, baking sheet, or scoop size than the one you normally use.
How to Store Chocolate Crinkle Cookies
Once completely cooled, store the baked cookies in an airtight container at room temperature.
They can generally be kept for about a week when stored properly, although the exact quality depends on the storage conditions.
For longer storage, freeze the baked cookies in a freezer-safe container with parchment between layers. They can be frozen for up to about three months.
Let frozen cookies thaw before serving.
Freezing unbaked dough
The dough can also be prepared ahead of time.
After chilling, shape it into balls but leave off the sugar coating. Freeze the dough balls in a single layer until firm, then transfer them to a freezer-safe bag or container.
When you want to bake them, coat the frozen dough balls in granulated sugar and powdered sugar immediately before baking.
Because frozen dough starts at a much lower temperature, it may need a little additional baking time. Watch the edges and centers rather than relying on the original timing alone.
Chocolate Crinkle Cookies: Common Mistakes at a Glance
| Problem | Likely cause | What to do |
|---|---|---|
| Cookies do not crack | Warm dough or weak rise | Chill thoroughly and check baking powder |
| Powdered sugar disappears | Coating too thin or dough too moist | Use a generous coating and sugar the balls first |
| Cookies are flat | Dough too warm or insufficient structure | Chill longer and check flour measurement |
| Centers are dry | Overbaking | Remove when edges are set and centers remain soft |
| Cookies spread unevenly | Uneven dough portions | Use a consistent scoop |
| Dough is difficult to roll | Not chilled enough | Return it to the refrigerator |
| Cookies look pale | Insufficient powdered sugar | Apply a heavier coating |
Where Chocolate Crinkle Cookies Came From
Chocolate crinkle cookies have been part of American home baking for decades. One well-known early published version appeared in a Betty Crocker cookbook in the 1950s and was associated with home baker Helen Fredell of Saint Paul, Minnesota.
The cookie has also become particularly popular in the Philippines, where chocolate crinkles are enjoyed throughout the year.
The appeal is easy to understand. The ingredients are accessible, the method does not require special decorating skills, and the finished cookies look distinctive straight from the oven.
The Best Part of This Chocolate Crinkle Cookie Recipe
The trick to reliable chocolate crinkle cookies is not a complicated technique. It is paying attention to the small details: chill the dough properly, use consistent portions, coat the dough generously, start with a fully preheated oven, and take the cookies out while their centers are still soft.
Once you understand how those pieces work together, the recipe becomes much easier to repeat. You can then experiment with espresso, peppermint, or extra chocolate without losing the fudgy texture and snowy cracks that make these cookies worth baking.
Can I make chocolate crinkle cookies without chilling the dough?
It is possible, but it is not recommended for the best texture and shape. Chilling makes the sticky dough easier to handle and helps reduce excessive spreading.
Can I use Dutch-process cocoa powder?
Yes, Dutch-process cocoa can give the cookies a darker color and a smoother chocolate profile. Keep in mind that cocoa types can behave differently in recipes, so avoid changing several ingredients at the same time.
How much powdered sugar should I use?
Use enough to cover the dough balls generously. If you can clearly see large areas of bare chocolate dough before baking, add more powdered sugar.
Why are my cookies not fudgy?
They may have been baked too long, or your dough may contain too much flour. Start by reducing the baking time slightly and checking your flour measurement.
Can I freeze chocolate crinkle cookie dough?
Yes. Shape the chilled dough into balls, freeze them without the sugar coating, and coat them immediately before baking. Frozen dough may need an extra minute or two in the oven.
Are chocolate crinkle cookies the same as chocolate crackle cookies?
The names are commonly used for the same style of cookie: a soft chocolate cookie covered in powdered sugar that develops a cracked surface during baking.