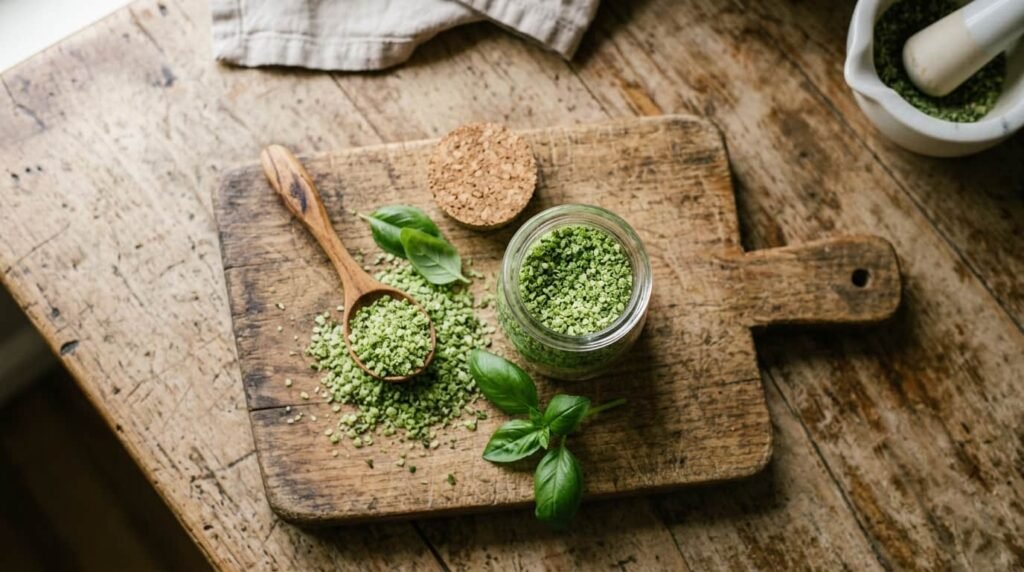
Basil Salt
Ingredients
Instructions
If your basil plant is putting out more leaves than you know what to do with, this basil salt recipe is the fix. It’s two ingredients, about ten minutes of hands-on work, and it turns a fistful of basil that would otherwise wilt on the counter into a jar of seasoning that keeps for months. I make a batch every August, right around the point when the basil on my porch starts bolting, and by winter it’s the thing I reach for on eggs, tomatoes, and pasta more than plain salt.
Why You’ll Love This Basil Salt
It solves a real problem. Basil doesn’t dry well on its own, the leaves turn black and flavorless, but blending it with salt locks in the color and the peppery-sweet flavor while the salt draws out the moisture. You end up with a finishing salt that tastes like summer even in January.
It’s also genuinely low effort. There’s no canning, no special equipment beyond a food processor, and no waiting days for anything to cure. Most of the “cook time” is just the basil sitting in a low oven while you do something else. And because it makes a full cup, it’s an easy homemade gift, a few tablespoons in a small jar looks a lot more thoughtful than it actually was to make.
Ingredients You’ll Need
You only need two things, but the type of each one matters more than you’d expect.
Fresh basil leaves (1 cup packed). Regular sweet Italian basil is the classic choice, but Thai basil or a mix of the two works well if that’s what’s growing. Use the leaves only, not the stems, they don’t process down finely and can leave woody bits in the finished salt.
Coarse salt (1 cup). Kosher salt or coarse sea salt both work. Skip iodized table salt if you can. It has a slightly metallic edge and tends to dull the basil’s green color as it sits. If you only have fine salt on hand, it’ll still work, just start with a little less since fine salt packs denser than coarse.
Some cooks like to add a bit of lemon zest or a small garlic clove into the food processor along with the basil. It’s optional, but it’s an easy way to make the salt taste a little more finished without adding a third labeled ingredient.
How to Make Basil Salt
Start by washing the basil and drying it thoroughly, this is the step people skip and regret. Any water clinging to the leaves turns into steam in the food processor, and that extra moisture is what causes clumping and, eventually, mold once the salt is jarred. Pat the leaves dry with a towel, or run them through a salad spinner if you have one.
Once the basil is dry, add it to the food processor along with the salt and pulse. You’re not looking for a smooth paste, just an even, fine mixture where you can’t pick out individual basil pieces anymore. This usually takes 20 to 30 pulses, stopping once or twice to scrape down the sides.
Spread the mixture thinly across a parchment-lined baking sheet and slide it into a 225°F oven. Twenty to twenty-five minutes is usually enough, give it a stir at the halfway point so it dries evenly. You’ll know it’s ready when the basil looks noticeably lighter and drier, almost dusty, rather than the wet, dark green it started as.
Let it cool completely before doing anything else with it. Warm salt still holds a little moisture, and sealing it in a jar while it’s warm is a fast track to a clumpy, questionable jar in a few weeks. Once it’s fully cool, pulse it once more in the food processor to break up any clumps that formed while baking, then transfer it to your storage jar.
No oven, or don’t want to run one for 25 minutes? Spread the mixture on a tray and let it air-dry at room temperature instead, stirring it occasionally. It takes one to two days rather than 25 minutes, but the result is the same.
Pro Tips for the Best Basil Salt
A few small things separate a basil salt that lasts from one that molds in a month.
Dry the basil like your storage life depends on it, because it does. Pat it dry, then pat it again if it still feels damp anywhere.
Stick close to a 1:1 ratio of basil to salt by volume. Go heavier on basil and you’ll get a stronger herb flavor, but it takes longer to dry and is more prone to clumping.
Don’t rush the cooling step. Fifteen minutes on the counter is enough, but sealing it warm undoes all the work the oven just did.
Use non-iodized salt if you want the brightest color and cleanest flavor. It’s a small swap that makes a noticeable difference after a few weeks in the jar.
Common Mistakes to Avoid
Jarring it while it’s still slightly damp. This is the number one reason basil salt goes bad early. If you have any doubt about whether it’s fully dry, give it another five minutes in the oven.
Using iodized table salt. It works in a pinch, but expect the color to fade to a dull olive faster and a faint metallic aftertaste.
Over-processing into a paste. If you blend too long, the basil’s cell walls break down completely and release too much liquid for the salt to absorb evenly. Pulse in short bursts instead of running the processor continuously.
Storing it near the stove or in direct sunlight. Heat and light both speed up flavor loss. A cabinet or pantry shelf is a better spot than the counter next to your oven.
Variations and Substitutions
Once you’ve made this once, it’s easy to riff on. Swap in mint, rosemary, or thyme for a completely different flavor profile, or combine two herbs if you want something more layered. Fresh rosemary and basil together works particularly well on roasted potatoes.
Add lemon or lime zest to the food processor for a brighter, more citrusy salt that’s especially good on fish and seafood. A small garlic clove or a half teaspoon of garlic powder turns it into more of an all-purpose seasoning blend. If you like heat, a pinch of red pepper flakes mixed in after drying adds a slow warmth without overpowering the basil.
Storage and Shelf Life
Stored in an airtight jar in a cool, dark cabinet, basil salt holds its color and flavor for about 2 to 3 months. After that it doesn’t spoil exactly, but the basil flavor fades and you’re mostly left with green-tinted salt.
For longer storage, keep the jar in the refrigerator instead. Refrigerated, it holds well for up to 6 months. Just let it come back to room temperature before using it if it’s clumped slightly from the cold, it’ll break apart easily with a fork.
If you ever notice a musty smell, dark spots, or the salt feels damp to the touch after it’s been jarred, that’s moisture that got in somehow, and it’s best to toss that batch rather than risk it.
Ways to Use Basil Salt
This is where the payoff is. Sprinkle it over sliced tomatoes or a caprese salad in place of regular salt, it’s an obvious pairing but still one of the best. It’s also excellent on scrambled or fried eggs, roasted or grilled vegetables, and grilled chicken or steak right before serving.
Try it on popcorn for a savory twist, or mix a spoonful into olive oil for a quick dip with bread. It also makes a nice finishing touch rimmed around the edge of a Bloody Mary or a savory cocktail. And because it keeps well and looks good in a small jar, it doubles as a low-effort homemade gift for anyone who cooks.
Frequently Asked Questions
How long does basil salt last?
About 2 to 3 months at room temperature in an airtight jar, or up to 6 months if you keep it refrigerated.
Can I use dried basil instead of fresh?
You can, but the flavor and color won’t be as vibrant. If using dried, start with about a third of the amount and skip the oven-drying step since it’s already dry.
Do I need a food processor?
It makes the job much faster, but a high-powered blender works too. Without either, you can finely chop dried basil by hand and mix it with the salt, though the texture will be coarser.
Can I skip drying it in the oven?
Yes, air-drying at room temperature works the same way, it just takes one to two days instead of 25 minutes. Either method gets you to the same dry, shelf-stable result.
Is basil salt the same as basil pesto?
No. Pesto includes oil, cheese, nuts, and garlic and needs to be refrigerated. Basil salt is just basil and salt, dried down into a shelf-stable seasoning that doesn’t need cold storage.
Can I make it with other herbs?
Definitely. The same method works for rosemary, thyme, mint, sage, or a combination. Basil just tends to be the most popular starting point because of how much of it people end up with in summer.