Outdoor Boys Bread Recipe: Campfire-Style Yeast Bread
If you have ever watched the Outdoor Boys bread recipe get mixed inside a Ziploc bag and fried over a fire, you already know why it caught on. It is a simple yeast dough, made from pantry staples, that rises overnight and fries up golden the next morning. No oven, no bread machine, no fuss. This guide breaks the whole process into clear steps, whether you are cooking it at a campsite or right on your kitchen stove.
What Is the Outdoor Boys Bread Recipe?
The Outdoor Boys bread recipe comes from Luke Nichols, who runs the Outdoor Boys YouTube channel with his kids Tommy, Nate, and Jake. Their videos show real camping trips, real fishing, and real cooking, bread included. The bread itself is a rustic, yeasted dough mixed with just flour, yeast, salt, sugar, and water, then fried in a skillet or griddle until the outside turns golden and the inside stays soft.
What makes it stand out is how forgiving it is. You do not need a stand mixer or a precise kitchen scale. You mix the dry ingredients at home, pack them in a bag, then add water when you are ready to cook. It works over an open flame, on a camp stove, or in a regular skillet at home, which is exactly why home cooks keep searching for this one.
How Do You Make Outdoor Boys Bread?
Mix bread flour, yeast, salt, and sugar with warm water to form a soft dough, let it rise for 30 to 60 minutes (or overnight at camp), then fry small portions in a hot, oiled skillet for two to three minutes per side until golden. Serve it warm with honey butter. That is the whole method in one paragraph, and the rest of this guide walks through why each step matters.
Outdoor Boys Bread Ingredients
You only need a handful of pantry items, and most of them can be pre-measured at home and carried in a bag.
For the dough:
- 3 cups bread flour (all-purpose flour works fine too, bread flour just gives more chew)
- 2¼ teaspoons active dry yeast (one standard packet)
- 1 teaspoon salt
- 1 tablespoon sugar
- 1 cup warm water, around 105 to 110°F
- 2 tablespoons oil or melted butter
For the honey butter:
- ½ cup softened butter
- 2 tablespoons honey
- A pinch of salt
I tested this in my own kitchen using a plain cast iron skillet on the stovetop, and it held up just as well as it does over an actual fire. The dough is genuinely low-stress. If it feels too wet, add a spoonful of flour. If it feels dry, add a splash more water. There is no wrong answer here, which is part of the appeal.
Common swaps that still work: all-purpose flour instead of bread flour, whole wheat flour for up to half the total for a denser, heartier crumb, or oil in place of butter if you want a slightly leaner dough. Self-rising flour works too, just skip the added salt and yeast since it already contains both, and expect the dough to rise a little faster than usual.
How to Make Outdoor Boys Bread (Step by Step)
This is the classic yeast-based version of the outdoor boys bread recipe, the one most people mean when they search for it.
Step 1: Activate the Yeast
Combine the warm water, yeast, and sugar in a bowl or a sealed bag. Let it rest for 5 to 10 minutes until it turns foamy on top. If nothing happens, your water was likely too hot or too cold, and the yeast may need to be replaced.
Step 2: Mix the Dough
Add the flour, salt, and oil to the yeast mixture. Stir until a soft, slightly sticky dough comes together. Sprinkle in a little extra flour if it clings too much to your hands.
Step 3: Knead
Knead for about 5 to 7 minutes, either on a floured surface or right inside a zip-top bag if you are keeping things tidy outdoors. You are looking for a dough that feels smooth and springs back slightly when pressed.
Step 4: Let It Rise
Cover the dough and set it somewhere warm for 30 to 60 minutes at home, or leave it in a warm corner of your tent overnight if you are camping. It should roughly double in size.
Step 5: Shape
Punch the dough down gently, then divide it into four pieces or leave it as one larger round, depending on your pan.
Step 6: Fry
Heat a cast iron skillet or griddle over medium heat with a bit of oil or butter. Fry each piece for 2 to 5 minutes per side, flipping often so it browns evenly instead of scorching on one side. You will know it is done when the crust turns deep gold and the loaf sounds hollow when you tap it.
The Classic Honey Butter Pairing
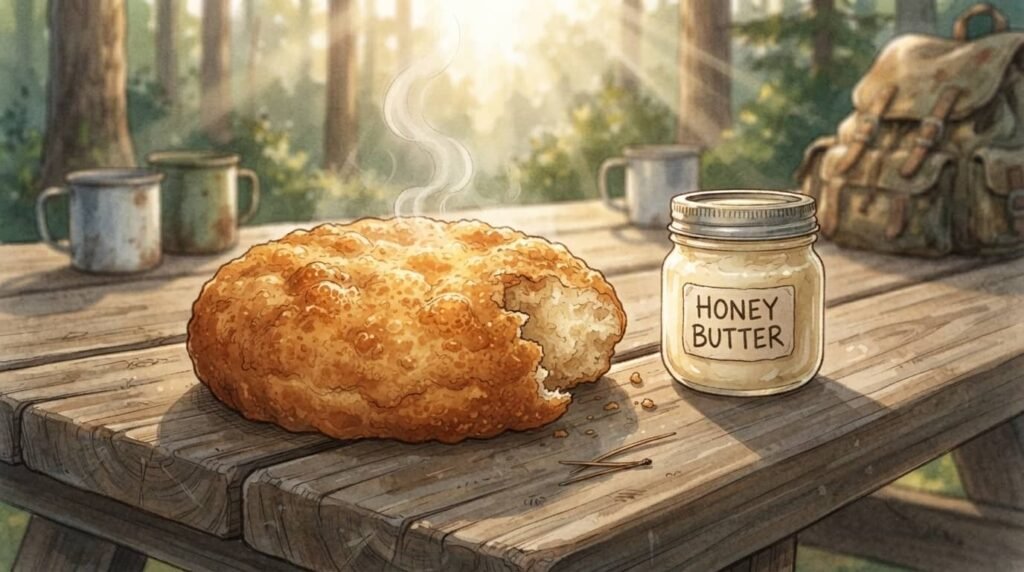
Honey butter is basically non-negotiable with this bread. While the dough fries, mix softened butter with honey and a pinch of salt until smooth. Spread it over the bread the moment it comes off the skillet, while it is still warm enough to melt into every bite. The combination of a slightly smoky, fried crust and sweet, salty butter is why this pairing shows up in nearly every version of the recipe online.
No-Yeast Flatbread Variation
Not everyone wants to wait for dough to rise, especially on a short trip. Swap the yeast for baking powder and you get a quick flatbread version instead. Mix flour, baking powder, a pinch of salt, and plain yogurt or water into a shaggy dough, then let it rest for about 30 minutes before rolling and frying. There is no proofing time involved, so you can go from mixing bowl to breakfast plate in well under an hour. This version leans closer to bannock, a pan-fried flatbread with a long history in outdoor and wilderness cooking.
Tips for Cooking Bread Over a Campfire or Skillet
- Go slower than feels natural. A fire that is too hot is the single most common reason this bread burns on the outside before the inside cooks through.
- Use a lid or foil. Covering the skillet loosely traps heat and helps the bread cook more evenly, similar to how an oven would.
- Pre-mix dry ingredients at home. Combining flour, yeast, salt, and sugar in a labeled Ziploc bag ahead of time turns this into a true grab-and-go camping bread mix.
- Cast iron holds heat best. It is not required, but it gives the most even crust of any surface, whether you are on a camp stove or a home range.
- Watch the yeast test. If your water and yeast mixture does not foam after 10 minutes, start over with fresh yeast rather than continuing with dead yeast.
- Plan for wind. Outdoor flames rarely burn evenly, so rotate the pan every minute or two instead of leaving one side facing the strongest heat the whole time.
This bread also travels well once it is cooked, which is worth knowing if you are packing food for a hike rather than frying fresh at camp. Wrapped in foil or a clean towel, a cooled loaf holds up for a day or two without turning stale or crumbly, similar to other sturdy backpacking breads like bannock or flatbread.
Frequently Asked Questions About Outdoor Boys Bread
Can I make Outdoor Boys bread without yeast?
Yes. Swap the yeast for baking powder and you get a faster flatbread version with no rise time needed, which is handy on short trips or busy mornings.
What is the best flour for Outdoor Boys bread?
All-purpose flour is the most common and easiest to find, and it works well. Bread flour is a small upgrade if you want a chewier texture, thanks to its higher protein content.
Why does my campfire bread burn on the outside?
This almost always comes down to heat that is too high. Move the pan slightly off direct flame, flip more often, and give the inside more time to cook through before the crust darkens.
Can I prepare the dough at home before camping?
Yes, and many people prefer it that way. Mix the dry ingredients into a bag at home, then add water and knead once you get to camp, or mix the full dough ahead and keep it chilled until you are ready to fry.
Is this recipe good for beginners and kids?
Very much so. The dough is forgiving, mistakes are easy to fix, and even an unevenly shaped loaf still tastes good with honey butter on top.
Can I make this gluten-free?
Yes, with a 1:1 gluten-free baking blend that includes xanthan gum for structure. The texture will be a little more delicate than the wheat-based version, so handle the dough gently when shaping and frying.
Part of what makes the outdoor boys bread recipe so popular is that it never demands perfection. Whether you are frying it over hot coals on a weekend trip or making it on a Tuesday night in your own skillet, the process stays the same: simple ingredients, a little patience, and warm bread with honey butter at the end of it. Give it a try this weekend, and if you experiment with a savory version using garlic or herbs, I would love to hear how it turns out.