Herb and Garlic Bread
Ingredients
Instructions
Herb and Garlic Breads: The Easiest Homemade Loaf You’ll Ever Bake
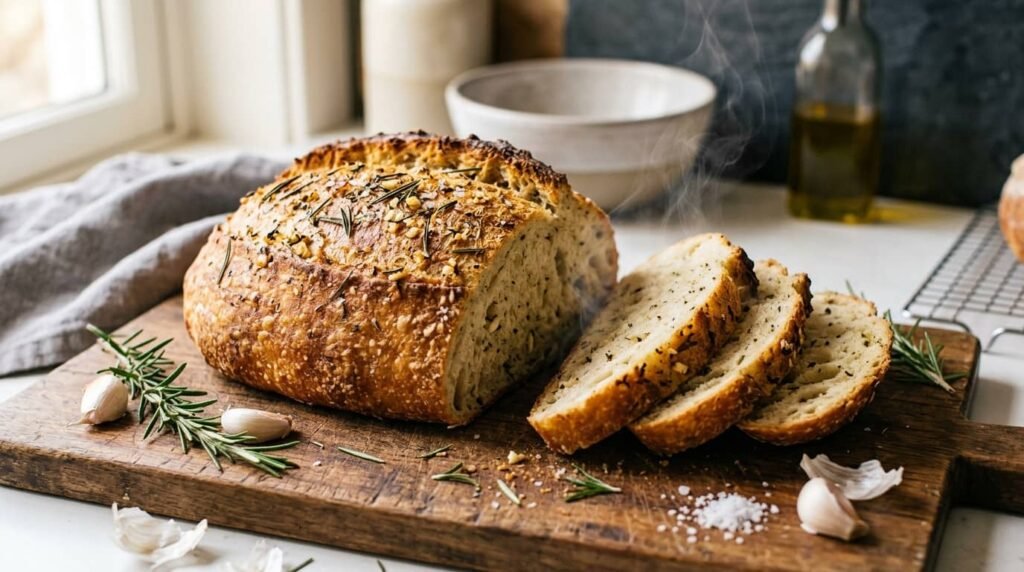
If you’ve been searching for herb and garlic breads that actually taste like something from a real bakery, this is the recipe to bookmark. Most versions online just butter up a store-bought baguette, which is fine in a pinch, but this loaf is baked from scratch with garlic and herbs kneaded right into the dough, so every single bite is packed with flavor instead of just the top layer. It comes out with a crackly golden crust, a soft pillowy center, and a garlicky aroma that fills the whole kitchen while it bakes.
I’ve made this loaf more times than I can count, testing it with fresh herbs, dried herbs, different flours, and even a few disasters along the way (more on those below so you don’t repeat them). What I landed on is a recipe that’s forgiving enough for a first-time bread baker but still turns out bakery-quality results every time.
Why You’ll Love This Herb and Garlic Bread
This isn’t your average garlic bread recipe where the flavor sits on the surface. Because the garlic and herbs get mixed straight into the dough, the flavor runs all the way through the crumb, not just the crust. It’s also genuinely beginner-friendly. Instant yeast means no finicky proofing steps, and the dough comes together with a stand mixer, a bread machine on the dough cycle, or just your hands and a bowl.
It’s also one of those recipes that fits almost any meal. Serve it warm with a bowl of pasta, dip it into olive oil, use it for grilled cheese, or turn leftovers into garlicky croutons. And because it freezes so well, you can double the batch and always have a loaf on hand.
Ingredients You’ll Need
The full quantities are in the recipe card above, but here’s what each ingredient is doing and where you can swap things out.
Bread flour gives the loaf more structure and chew than all-purpose flour, thanks to its higher protein content. All-purpose flour works fine too, the loaf will just be slightly softer and less chewy.
Instant yeast is mixed straight into the dough with no separate proofing step needed, which speeds things up. If you only have active dry yeast, use the same amount, just add about 10-15 extra minutes to your first rise.
Warm water should sit around 110°F, warm to the touch but not hot. Water that’s too hot will kill the yeast, which is one of the most common reasons homemade bread doesn’t rise.
Fresh garlic gives this bread its backbone. Mince it finely so it distributes evenly through the dough instead of clumping in one bite. In a pinch, 1 teaspoon of garlic powder can stand in for the fresh cloves, though the flavor will be milder and less pungent.
Fresh herbs like parsley and rosemary bring a bright, aromatic edge that dried herbs alone can’t match, though dried oregano rounds things out nicely and holds up well during baking. If you only have dried herbs on hand, use about a third of the amount called for fresh, since dried herbs are more concentrated.
Parmesan cheese on top isn’t strictly necessary, but it adds a salty, nutty crust that makes this loaf taste closer to a bakery focaccia.
How to Make Herb and Garlic Bread
Start by blooming the yeast in warm water with a spoonful of sugar. Give it 5 to 10 minutes and you should see a foamy layer form on top. If nothing happens, your yeast is likely expired or your water was too hot, and it’s worth starting over rather than baking with dead yeast.
From there, the garlic, herbs, olive oil, flour, and salt all go into the same bowl. Mix it into a shaggy dough, then turn it out onto a floured counter and knead for 8 to 10 minutes. You’re looking for a dough that’s smooth, slightly tacky but not sticky, and springs back slowly when you poke it. This kneading step is what builds the gluten structure that gives the bread its chew, so don’t rush it.
The dough then needs two rises. The first, longer rise (1 to 1 1/2 hours) happens in a bowl until it’s doubled in size. After shaping it into a loaf, a shorter second rise (30 to 45 minutes) lets the dough relax and puff up again before baking. Skipping the second rise is one of the fastest ways to end up with a dense loaf, so resist the urge to shortcut it.
Once it’s in the oven, the loaf bakes at 375°F until deep golden brown, usually 25 to 30 minutes. A hollow sound when you tap the bottom of the loaf is the clearest sign it’s done. Brushing it with more garlic butter right out of the oven, then finishing with Parmesan and flaky salt, is what takes it from good to genuinely craveable.
Pro Tips for the Best Herb and Garlic Bread
Use room temperature butter and eggs if your version of this recipe includes them, since cold ingredients slow down yeast activity and can lead to an uneven rise. Weigh your flour with a kitchen scale if you have one. Scooping flour straight from the bag tends to pack it down, which means you can end up with 20 to 30% more flour than the recipe intends, and that’s a common cause of dry, dense bread.
Let the dough rise somewhere genuinely warm, like inside an oven with just the light on, or near a sunny window. A cold kitchen can double your rise time. Finally, don’t skip brushing the crust with butter right when it comes out of the oven. The residual heat helps the butter soak in slightly instead of just sitting on top, which keeps the crust from turning tough as it cools.
Common Mistakes to Avoid
The most common issue home bakers run into is dense, heavy bread, and it almost always comes down to one of three things: expired yeast, water that was too hot or too cold, or not kneading long enough to develop gluten. If your dough hasn’t roughly doubled after the first rise, don’t move forward with shaping it. Give it more time in a warmer spot instead.
Another mistake is adding raw garlic directly onto the crust before baking rather than mixing it into the dough or brushing it on as butter. Raw garlic exposed directly to high oven heat for the full bake time can turn bitter and scorched. Keeping it either mixed into the dough or added as a butter glaze near the end of baking avoids that burnt-garlic flavor.
Over-flouring during kneading is another frequent culprit behind tough bread. Add flour gradually while kneading and stop as soon as the dough stops sticking to your hands, even if it still feels a little tacky.
Variations and Substitutions
This dough is a great base for experimenting once you’ve made it once or twice. For a cheesy garlic bread, fold shredded mozzarella into the dough itself along with the herbs. For a spicy version, add a pinch of red pepper flakes to the garlic butter you brush on at the end. If you want a dairy-free or vegan loaf, swap the butter for a plant-based alternative and skip the Parmesan, or use a dairy-free Parmesan substitute.
You can also shape this dough differently depending on what you’re serving it with. Divide it into individual rolls for a dinner-table bread basket, braid it for a more decorative presentation, or press it flat and dimple it like focaccia for a quicker bake. If you’re short on time and just want that classic garlic bread flavor, this same garlic herb butter (minus the yeast dough) can be spread straight onto a halved store-bought baguette or French bread and broiled for 5 to 7 minutes until bubbly and golden.
Storage and Reheating Instructions
Once the bread has cooled completely, store it at room temperature in an airtight container or bread bag for up to 2 days. Because this loaf has olive oil and butter worked into it, it stays soft longer than a plain baguette, but it’s still best eaten within the first couple of days for peak texture.
For longer storage, this bread freezes beautifully. Wrap the whole loaf, or individual slices, tightly in plastic wrap followed by a layer of foil, and freeze for up to 3 months. Label it with the date so you’re not guessing later. To reheat, thaw sliced pieces at room temperature or straight in a 350°F oven for about 10 minutes if frozen solid. A quick reheat in the oven or air fryer at 350°F for 5 to 7 minutes brings back that just-baked texture far better than the microwave, which tends to make bread rubbery.
What to Serve With Herb and Garlic Bread
This loaf is built for dipping, dunking, and scooping. It’s a natural partner for a bowl of marinara or alfredo pasta, a hearty tomato or minestrone soup, or a simple green salad with vinaigrette. Slice it thick for grilled cheese, toast it for bruschetta, or serve it warm alongside a weeknight roast chicken. Leftover slices also make excellent croutons: just cube them, toss with olive oil, and toast until crisp for salads or soup toppers.
Frequently Asked Questions
Can I use garlic powder instead of fresh garlic?
Yes, though the flavor will be noticeably milder. Use about 1 teaspoon of garlic powder in place of the 4 fresh cloves called for in the dough, and consider adding a bit more fresh minced garlic to the butter you brush on at the end for a stronger garlic punch.
Why didn’t my bread rise?
This is almost always a yeast problem. Your yeast may have been expired, your water may have been too hot (above 120°F kills yeast) or too cold (below 100°F won’t activate it properly), or your kitchen may simply be too cold for the dough to rise in a reasonable time. Try moving the covered bowl to a warmer spot, like an oven with just the light turned on.
Can I make the dough ahead of time?
Yes. After the first rise, you can punch down the dough, wrap it tightly, and refrigerate it for up to 24 hours. Let it come to room temperature for about 30 minutes before shaping and continuing with the second rise.
Can I freeze the dough instead of the baked bread?
You can, though baked-and-frozen bread tends to give more reliable results for home bakers. If freezing raw dough, do it after the first rise, wrap it well, and thaw it in the refrigerator overnight before shaping and letting it come to room temperature to finish rising.
How do I know the bread is fully baked?
The crust should be deep golden brown, and the loaf should sound hollow when you tap the bottom. If you have an instant-read thermometer, the internal temperature should read around 190-200°F.
Is this recipe the same as regular garlic bread?
Not quite. Classic garlic bread is usually a garlic butter spread on top of an already-baked loaf, like a baguette, then toasted or broiled. This recipe bakes the garlic and herbs into the dough itself, which gives a more even, deeper flavor throughout the whole slice rather than just on the surface.