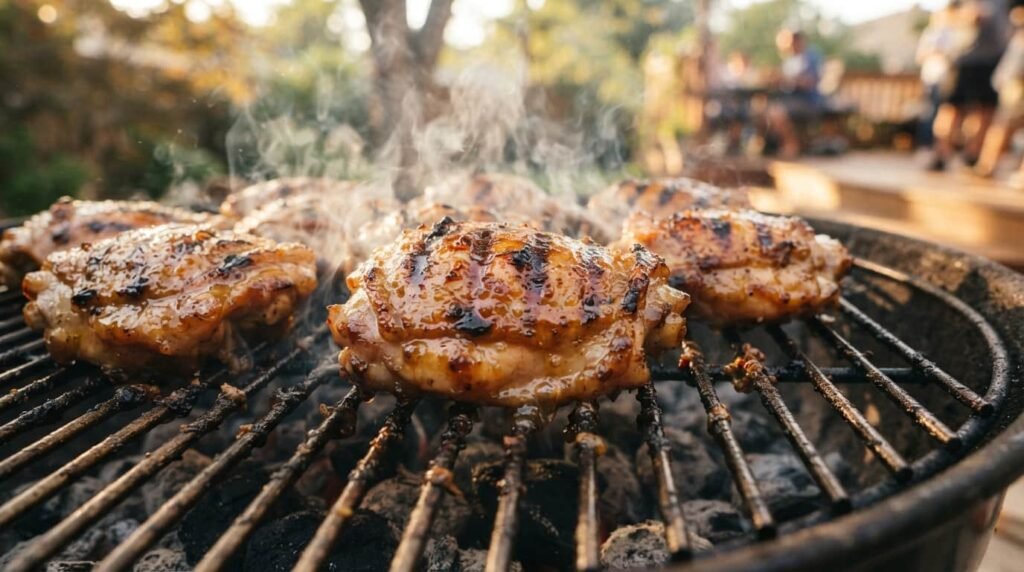
Salt and Honey Glaze for Grilling
A salt and honey glaze for grilling turns a plain piece of chicken, salmon, or pork into something sticky, caramelized, and genuinely craveable, and it takes less effort than most cooks expect. The two ingredients balance each other out. Honey brings the sweetness and the shine. Salt keeps that sweetness from tipping into cloying and pulls out the savory notes underneath. Together they create the kind of glossy, lightly charred coating you usually associate with a good barbecue joint, made with two pantry staples and a grill.
I’ve burned my fair share of glazes over the years, watching a beautiful amber coating turn bitter and black in under a minute because I brushed it on too early. That mistake is what taught me the real trick to this glaze: it’s not about the recipe, it’s about the timing.
What Is a Salt and Honey Glaze?
A salt and honey glaze is a simple grilling sauce made from honey, a pinch of salt, and usually a splash of acid like lemon juice or vinegar to keep the sugars from scorching. It’s brushed onto meat or vegetables during the final minutes of grilling, where the direct heat caramelizes the honey into a sticky, golden crust. The salt sharpens the flavor so the glaze reads as savory-sweet instead of just sweet.
Unlike a marinade, this glaze isn’t meant to soak into the food for hours. It’s a finishing touch, applied late and often, so it clings to the surface instead of dripping into the coals.
Why Salt and Honey Work So Well Together on the Grill
Honey on its own can taste flat, even a little one-note, once it hits high heat. Salt fixes that. A small amount rounds out the sweetness and makes every other flavor in the dish, whether it’s garlic, black pepper, or smoked paprika, taste more defined. This is the same reason a pinch of salt shows up in caramel and chocolate desserts. Sugar and salt are natural partners, not opposites.
There’s a practical side too. Honey is mostly sugar, and sugar caramelizes fast under direct heat. Left unchecked, that caramelization tips into burning within seconds. Salt doesn’t slow that process down by itself, but combined with the right timing and a splash of acid, it helps you build a glaze that browns evenly instead of scorching in patches.
The Best Salt and Honey Glaze Recipe for Grilling
This base recipe makes enough for about four servings of chicken, salmon, or pork chops, and it scales easily if you’re cooking for a crowd.
Ingredients:
- 1/3 cup honey
- 1/2 teaspoon kosher salt
- 1 tablespoon lemon juice or rice vinegar
- 1 tablespoon olive oil
- 1 clove garlic, minced (optional)
- A pinch of black pepper
Instructions:
- Whisk the honey, salt, lemon juice, olive oil, garlic, and pepper together in a small bowl until the salt dissolves.
- Let the glaze sit for five minutes so the flavors come together before you start grilling.
- Set some aside in a separate small dish for brushing on raw meat, and keep the rest for basting during cooking, so you never dip a used brush back into the glaze that touched raw food.
That’s the whole glaze. It’s intentionally simple, because the grill does the real work of turning it into something special.
How to Apply a Salt and Honey Glaze Without Burning It
This is the part most home cooks get wrong, and it’s the difference between a glaze that caramelizes beautifully and one that turns bitter. Honey starts to scorch below 300°F once it’s exposed to direct flame for too long, so timing matters more than the recipe itself.
Quick answer: brush the salt and honey glaze on during the last 8 to 10 minutes of grilling, not before. Applying it earlier gives the sugars too much time over direct heat, and they burn before the meat finishes cooking.
A few habits make this easier:
- Cook the protein most of the way first, then start brushing. For chicken breasts or thighs, that usually means waiting until the internal temperature is within 15 to 20 degrees of done.
- Brush in thin layers. A heavy first coat is more likely to pool and burn than two or three light passes.
- Watch for flare-ups. If the glaze starts to blacken or the flames jump, move the food to a cooler part of the grill for a minute rather than pulling it off entirely.
- Use indirect heat for anything glazed early, and save direct heat for the final char.
- Keep a thermometer nearby. Guessing at doneness usually means either undercooked meat or an overcooked, over-caramelized glaze.
If you’re working with a charcoal grill, keep in mind that coals run hotter and less evenly than gas, so check the surface temperature more often once the glaze goes on.
Best Meats and Vegetables for a Salt and Honey Glaze
This glaze isn’t limited to one protein. It works well anywhere a touch of sweetness and char make sense.
- Chicken thighs and breasts hold the glaze well because their surface has enough fat to help it cling and caramelize evenly.
- Salmon takes to a salt and honey glaze especially fast since it only needs two to three minutes per side, so brush it on almost from the start of grilling.
- Pork chops and pork tenderloin pair naturally with honey’s sweetness, and a little extra salt helps balance pork’s richness.
- Vegetables like carrots, sweet potatoes, and Brussels sprouts caramelize beautifully with this glaze, though thinner vegetables like zucchini can scorch quickly and need closer attention.
Whatever you’re glazing, the same rule applies: get most of the cooking done first, then bring in the honey.
Grill Setup and Temperature for Sticky Glazes
A two-zone setup, meaning one hotter side and one cooler side of the grill, gives you the most control. Cook the protein on the hotter side until it’s most of the way done, then move it to the cooler side once the glaze goes on. That way the sugars caramelize slowly instead of scorching on high, direct heat.
Aim for a grill surface temperature around 400°F to 450°F for chicken and pork, and closer to 375°F for salmon, which cooks faster and burns more easily. If flare-ups keep happening even after you’ve moved the food, it usually means there’s too much glaze pooling underneath rather than brushed on thin.
Storing and Reusing Leftover Glaze
Leftover salt and honey glaze keeps well in an airtight jar in the refrigerator for up to two weeks, since honey is naturally resistant to spoilage. If it thickens or crystallizes in the fridge, warm the jar in a bowl of hot water for a few minutes to loosen it back up.
Never reuse glaze that touched raw meat unless you bring it to a full simmer first to kill off any bacteria. It’s safer, and easier, to just set aside a clean portion for basting before the glaze ever meets raw protein.
A Simple Glaze Worth Getting Right
A salt and honey glaze for grilling doesn’t need a long ingredient list or a complicated method. It needs the right timing, a light hand with the brush, and a little patience once the food hits the grill. Get those three things right, and you’ll have a glaze that turns into a sticky, golden crust instead of a burnt mess, on chicken, salmon, pork, or a tray of roasted vegetables.
Try it on whatever you’re grilling this weekend, and adjust the salt and acid to your own taste. Once you’ve got the base down, it’s easy to make it your own.
Frequently Asked Questions
How do you keep a honey glaze from burning on the grill?
Apply it only in the last 8 to 10 minutes of cooking, brush it on in thin layers, and move the food to indirect heat if the flames start to flare. Honey burns fast on direct heat, so timing matters more than technique here.
Should I salt the meat before or after glazing?
Season the meat with salt before it goes on the grill, then apply the salt and honey glaze separately near the end of cooking. Pre-salting seasons the meat all the way through, while the glaze’s salt is mainly there to balance the honey’s sweetness on the surface.
Can I use a salt and honey glaze on vegetables?
Yes, especially root vegetables like carrots and sweet potatoes, which hold up well to the sugars caramelizing. Toss them in oil first, then brush on the glaze during the last 8 to 10 minutes of grilling, the same as you would with meat.
What’s the best honey for a grilling glaze?
A basic clover or wildflower honey works fine for most glazes and won’t compete with other flavors. If you want a more distinct taste, a darker honey like buckwheat adds a deeper, almost molasses-like note that pairs well with pork.