
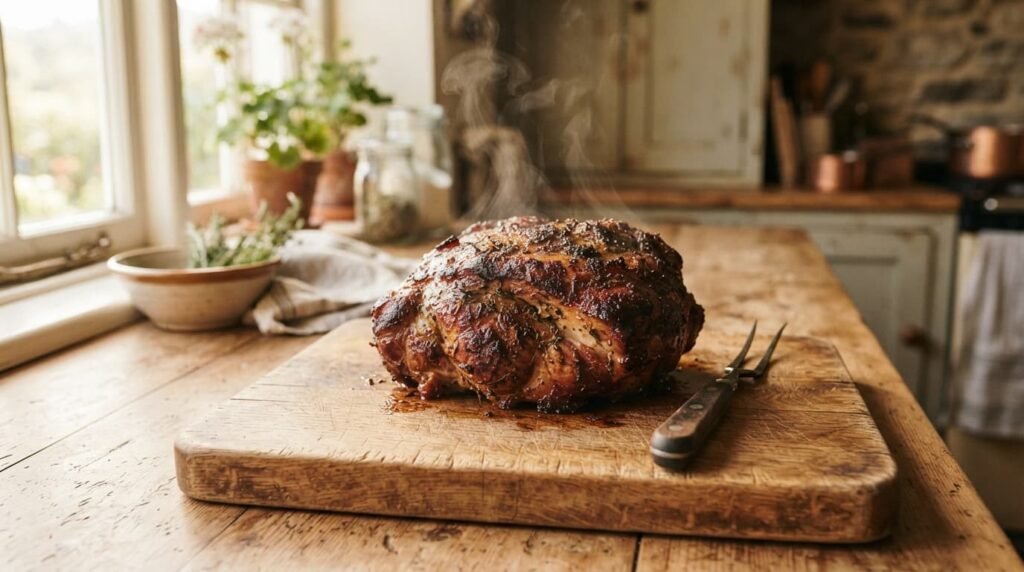
How to Cook Pork Shoulder: A Complete Guide (2026)
Learning how to cook pork shoulder comes down to one idea: low heat, plenty of time, and a thermometer you actually trust. This cut is tough going in, forgiving in the middle, and fall-apart tender coming out, as long as you don’t rush it. Whether you’re roasting it whole for sliced pork or breaking it down into pulled pork for sandwiches, the method below works with almost any oven, any size cut, and any skill level.
I’ve made this cut more times than I can count in my own kitchen, and the biggest lesson has always been the same one: the oven does the work, you just need to stay out of its way.
What Is Pork Shoulder, Exactly?
Pork shoulder comes from the upper front leg and shoulder area of the pig, a hardworking muscle loaded with connective tissue and marbled fat. That combination is exactly what makes it tricky to cook quickly but incredible to cook slowly.
You’ll usually see it sold under two names:
- Boston butt (or just “pork butt”): the upper portion of the shoulder, slightly fattier, the classic choice for pulled pork.
- Picnic shoulder: the lower portion, closer to the leg, often sold with the skin on.
Both are commonly labeled “pork shoulder” at the grocery store, and for home cooking purposes they behave similarly. You’ll also choose between bone-in and boneless. Bone-in tends to cook a little more evenly and gives you a built-in doneness cue (more on that below), while boneless is easier to season on all sides and slice into smaller pieces if your cut is oddly shaped.
How Long Does Pork Shoulder Take to Cook?
At 325°F, plan on roughly 30 to 40 minutes per pound for oven-roasted pork shoulder, so a 5-pound roast lands around 2.5 to 3.5 hours, and an 8-pound roast closer to 4 to 5 hours. If you want shreddable pulled pork rather than sliceable roast pork, add extra time, since you’re cooking to a much higher internal temperature.
How to Cook Pork Shoulder in the Oven, Step by Step
This is the most reliable, hands-off method for home cooks, and it’s the one I reach for most often.
- Bring the pork to room temperature. Pull it out of the fridge 30 to 60 minutes before cooking so it cooks more evenly.
- Trim and season. Trim any excessively thick fat cap, but leave a good layer, since it bastes the meat as it renders. Season generously with kosher salt, pepper, and any dry rub or fresh herbs you like. This is a large cut, so season more heavily than feels natural.
- Sear, if you want extra flavor (optional). Browning the outside in a hot Dutch oven or skillet before roasting deepens the flavor, though it’s not required for a good result.
- Set the oven to 325°F. Place the pork fat-side up on a rack in a roasting pan, or in a Dutch oven with a small amount of liquid, such as broth, apple cider vinegar, or beer, in the bottom.
- Roast low and slow. Cover for the first few hours to trap steam and speed things along, then uncover for the last stretch to let the outside brown and crisp.
- Cook to temperature, not the clock. Use a meat thermometer inserted into the thickest part, away from the bone. Times above are estimates. Your oven and your specific cut will vary.
- Rest before serving. Tent the pork loosely with foil and let it rest 15 to 30 minutes. This lets the juices redistribute so the meat stays moist when you slice or shred it.
What Temperature Should Pork Shoulder Reach?
This is where a lot of confusion happens, because the “safe” temperature and the “delicious” temperature for pork shoulder aren’t the same number.
The USDA’s minimum safe internal temperature for pork is 145°F. Pork shoulder is technically safe to eat at that point. But because it’s packed with collagen and connective tissue, 145°F still produces tough, chewy meat. If you’re slicing the roast rather than shredding it, aim for 190 to 195°F, where the collagen has had time to soften. If you want classic pulled pork that falls apart with two forks, push it to 195 to 205°F, where the collagen fully breaks down into gelatin and bastes the meat from the inside.
In short: cook it well past “done” if you want it truly tender. This is one of the few cuts where more time almost always means a better result, right up to that upper range.
How Long to Cook Pork Shoulder (Per Pound Guide)
Cooking time depends heavily on weight, whether the cut is bone-in or boneless, and your target temperature. Here’s a general guide at 325°F:
- 4 pounds: about 2 to 3 hours for slicing, 3.5 to 4.5 hours for pulled pork
- 5 to 6 pounds: about 3 to 4 hours for slicing, 4.5 to 6 hours for pulled pork
- 7 to 8 pounds: about 4 to 5 hours for slicing, 6 to 7 hours for pulled pork
Bone-in cuts generally take a bit longer than boneless because the bone slows heat transfer through the center. Lower oven temperatures, like 275°F to 300°F, stretch these times further but tend to produce even more tender results, which is why many barbecue cooks prefer to go low and slow over many hours rather than rushing at a higher heat.
Expect a “stall,” a period where the internal temperature seems to stop climbing, often somewhere around 160°F. This is normal. It happens as moisture evaporates from the surface and temporarily cools the meat. Resist the urge to crank the heat. Let it push through on its own.
Oven vs. Slow Cooker vs. Dutch Oven: Which Method Wins?
All three methods can produce great pork shoulder, and the right one mostly comes down to your schedule and equipment.
Oven roasting gives you the best exterior bark or crackling, since dry heat browns the surface while the interior slowly tenderizes. It’s the method above, and it’s the one I’d choose if you care about presentation or want sliceable meat.
Slow cooker is the most hands-off option and works well for shredded pulled pork. Set it on low for 8 to 10 hours or high for 5 to 6 hours, with the meat partially submerged in broth, beer, or another liquid. You won’t get a crisp exterior, but you also don’t need to watch it.
Dutch oven braising splits the difference: you get some browning from an initial sear, then the covered pot traps moisture for a fork-tender braise, generally in the 2 to 4 hour range depending on size. This is a great option if you want more flavor control through the braising liquid and vegetables.
Whichever method you choose, the underlying principle doesn’t change: pork shoulder needs time and gentle heat to turn tough connective tissue into tender, juicy meat.
How to Tell When Pork Shoulder Is Done
A thermometer is the most reliable tool, but there are a couple of physical cues worth knowing, especially for bone-in cuts.
- The bone wiggles freely. If your shoulder is bone-in, the bone should twist and pull out with little to no resistance when it’s fully done.
- A fork meets no resistance. For pulled pork, a fork should slide in and the meat should pull apart easily, almost like it’s falling apart on its own.
- The meat shrinks noticeably from its original size, and the surface develops a deep, dark crust or bark.
If any of these cues aren’t quite there yet, give it more time rather than pulling it early. Pork shoulder is one of the more forgiving cuts in the kitchen. It’s genuinely difficult to overcook using low, slow heat, so when in doubt, let it go longer.
Storing and Reheating Leftover Pork Shoulder
Cooked pork shoulder keeps well, which is part of why it’s such a good cut for meal prep. Store leftovers in an airtight container in the refrigerator for up to 4 to 5 days, or freeze for up to 3 months.
To reheat without drying it out, add a splash of broth or the reserved cooking liquid, cover tightly, and warm gently in a low oven or on the stovetop rather than blasting it in the microwave. If you saved the strained cooking liquid, mixing a little back into shredded pork before storing keeps it noticeably juicier days later.
Bringing It All Together
Cooking pork shoulder rewards patience more than precision. Season it well, keep the heat low, trust your thermometer over the clock, and let it rest before you cut in. Once you’ve made it once, you’ll see why so many home cooks keep coming back to this cut for everything from weeknight sandwiches to weekend dinner parties. Try it this week, and let it turn into a few more meals than you expected.
Frequently Asked Questions
Is pork shoulder the same thing as pork butt?
They’re closely related but not identical. Pork butt, also called Boston butt, is the upper portion of the shoulder and is fattier and better suited to pulled pork. Picnic shoulder is the lower portion. Many grocery stores label both simply as “pork shoulder,” so check the package details if you want a specific cut.
Can you overcook pork shoulder?
It’s genuinely hard to do with low, slow heat. Because the fat and collagen keep basting the meat as they render, pork shoulder stays moist well past the point where a leaner cut would dry out. The bigger risk is undercooking it and ending up with tough, chewy meat rather than pushing it too far.
Should you sear pork shoulder before roasting?
It’s optional but worth doing if you have the time. Searing the outside in a hot pan before it goes into the oven builds a deeper, more flavorful crust. Skipping this step still produces good results. It just won’t be quite as pronounced.
What’s the minimum safe temperature for pork shoulder?
The USDA’s minimum safe internal temperature is 145°F, followed by a short rest. That said, most cooks push well past this, into the 190°F to 205°F range, because the texture is dramatically better once the connective tissue has had time to break down.


Pingback: What Is Pork Belly? A Complete Guide (2026)