How to Make Chicken Bone Broth at Home
Learning how to make chicken bone broth is easier than most people expect, and it mostly comes down to one thing: time. You simmer chicken bones and a few vegetables in water for many hours, and the low, slow heat pulls out collagen, minerals, and flavor that a quick pot of broth just can’t match. I’ve made this dozens of times in my own kitchen using nothing more than a leftover roast chicken carcass, and it always turns out richer and more useful than anything from a carton.
This guide walks through the ingredients, the stovetop method, a slow cooker and Instant Pot option, and the troubleshooting questions that trip people up most, like why a batch didn’t gel or turned cloudy.
How Do You Make Chicken Bone Broth?
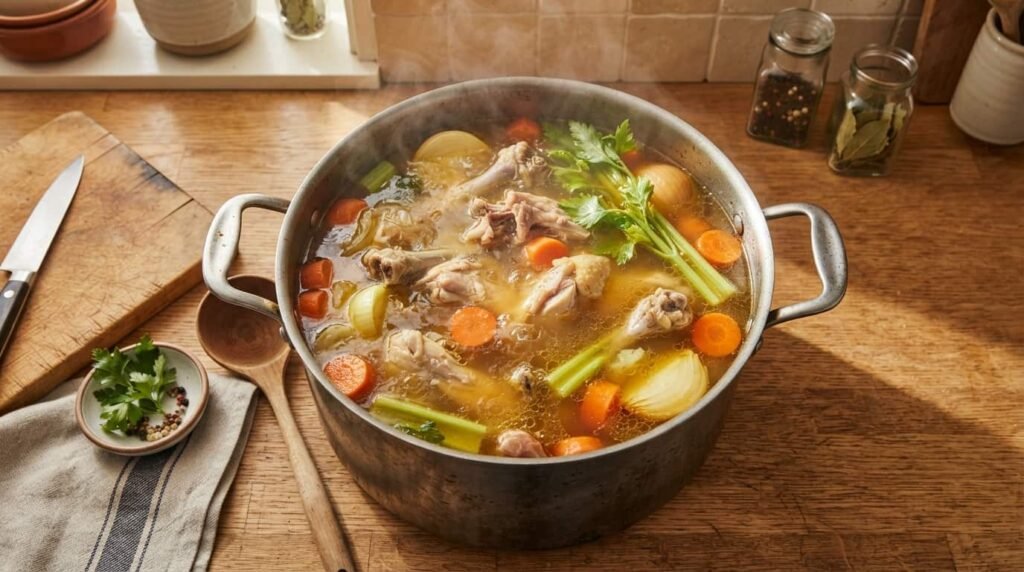
Combine chicken bones (raw or from a cooked carcass) with onion, carrot, celery, a splash of apple cider vinegar, and cold water in a large pot. Bring it to a gentle simmer, skim off the foam that rises, then let it simmer uncovered for 12 to 24 hours. Strain out the solids, chill the broth, and skim the fat once it’s set. That’s the whole process. Everything else in this guide is about getting the details right so the broth turns out flavorful and gelatin-rich instead of thin and watery.
What You Need to Make Chicken Bone Broth
You don’t need fancy equipment or hard-to-find ingredients. A large stockpot, a fine mesh strainer, and a handful of pantry staples will get you there.
- Chicken bones: a whole carcass from a roasted chicken, or a mix of raw backs, necks, and wings. Chicken feet are optional but add extra collagen if you want a broth that sets firm.
- Onion, carrot, and celery: the classic aromatic base, roughly chopped. No need to peel the onion if you want a deeper golden color.
- Apple cider vinegar: one to two tablespoons. The acid helps pull minerals and collagen out of the bones as they cook.
- Bay leaf, peppercorns, and a few sprigs of parsley or thyme: for gentle background flavor without overpowering the broth.
- Cold, filtered water: enough to cover everything by an inch or two, with more kept warm on the side to top up the pot as it simmers.
Skip the salt at this stage. Bone broth is a building block, and salting it now can mean an oversalted soup later once the broth reduces.
How to Make Chicken Bone Broth on the Stovetop
This is the method most home cooks reach for, and it needs almost no hands-on time once it gets going.
- Start with cold water. Place the bones in a large stockpot and cover with cold water. Starting cold rather than hot helps draw out more impurities before the broth heats up.
- Bring it to a bare simmer. As the pot heats, a grayish foam will rise to the surface. Skim it off with a spoon and discard it. This step is what keeps the finished broth clear instead of cloudy.
- Add the vegetables and vinegar. Once the foam has mostly stopped forming, add the onion, carrot, celery, bay leaf, peppercorns, and vinegar.
- Simmer low and slow. Keep the heat low enough that you only see the occasional lazy bubble, not a rolling boil. Let it go for 12 to 24 hours, adding hot water from a kettle as the level drops so the bones stay covered.
- Strain the broth. Pour it through a fine mesh strainer into a clean pot or large bowl, letting it drip through without pressing on the solids.
- Chill it quickly. Set the pot in an ice bath in the sink until the broth drops below 70°F, then refrigerate it uncovered until fully cold, and cover it the next day.
- Skim the fat. Once chilled, a layer of fat will have solidified on top. Scrape it off before using or freezing the broth.
A pot of chicken bone broth made this way will usually have a light jiggle when fully chilled, a sign that collagen broke down into gelatin during the long simmer.
What’s the Difference Between Chicken Broth, Stock, and Bone Broth?
Chicken broth is made from meaty pieces of chicken simmered for one to three hours, giving a lighter, faster result meant for sipping or light soups. Chicken stock leans more on bones than meat and simmers a bit longer to build body for sauces and cooking. Bone broth pushes the simmer time even further, often 12 to 24 hours, which breaks down far more collagen and gives the broth its thicker, more gelatinous texture. In practice, many home cooks use the terms interchangeably, and the method in this guide works whether you call the result broth, stock, or bone broth.
How Long Should You Simmer Chicken Bone Broth?
Twelve to 24 hours is the range most recipes land on, with 20 hours often cited as a sweet spot for flavor and gel without pushing things too far. Shorter simmers of 6 to 8 hours will still give you a tasty chicken stock, just with less collagen extracted. The longer the bones sit at a gentle simmer, the more minerals and gelatin end up in the pot, so if you’re short on time, a shorter simmer is still worth doing rather than skipping the broth altogether.
Can You Make Chicken Bone Broth in a Slow Cooker or Instant Pot?
Yes, and both are good options if a 12-plus-hour stovetop simmer doesn’t fit your schedule. In a slow cooker, add the same ingredients and cook on low for 12 to 24 hours, which mimics the gentle stovetop method almost exactly and needs even less monitoring. In an Instant Pot or other electric pressure cooker, the same batch of bones and vegetables can turn into a rich, gelatinous broth in about 120 minutes on high pressure, followed by a natural release. Pressure cooking speeds things up dramatically because the higher temperature and sealed environment pull collagen out of the bones much faster than a simmer ever could.
Why Didn’t My Bone Broth Gel?
If your chilled broth stays liquid instead of turning jiggly, it usually means not enough collagen made it into the pot. This isn’t a sign anything went wrong food-safety-wise, and the broth is still perfectly good to use. A few adjustments tend to fix it next time.
- Use more collagen-rich parts. Chicken feet, wings, and backs contain more connective tissue than breast bones alone.
- Simmer longer. A short 4 to 6 hour cook often isn’t enough time to break down much collagen.
- Check your ratio of bones to water. Too much water relative to bones dilutes the gelatin. Use just enough to cover the bones by an inch or two.
- Add a splash of vinegar. The acid helps pull minerals and collagen loose from the bone structure during the simmer.
Cloudy broth is a separate issue, usually caused by boiling too hard, skipping the early skimming step, or stirring the pot while it cooks. Keeping the heat low and skimming the foam early on will give you a clearer, golden result.
Tips for the Best Chicken Bone Broth
A few small habits separate a flat-tasting batch from one worth freezing a full shelf of.
- Roast the bones first for deeper flavor. If you’re starting with raw bones instead of a cooked carcass, roasting them at 400°F for 30 to 40 minutes before they go in the pot adds a browned, savory note that a plain simmer won’t give you on its own.
- Don’t add garlic at the start. A long simmer can turn garlic bitter. If you want that flavor, stir it into the finished broth or into whatever soup you’re making with it.
- Keep the lid off, or just cracked. An uncovered or partly covered pot lets some liquid evaporate slowly, which concentrates the flavor as the hours pass.
- Taste before you judge it. Unsalted bone broth can taste surprisingly flat straight out of the pot. A small pinch of salt in a test spoonful will tell you a lot more about how the finished flavor is shaping up.
- Save vegetable scraps in the freezer. Onion ends, carrot peels, and celery tops can go straight into the pot instead of the trash, which makes this an almost free way to use up kitchen scraps you’d otherwise toss.
Ways to Use Chicken Bone Broth
Once you’ve got a batch cooling in the fridge or stacked in the freezer, there’s no shortage of ways to put it to work. Use it as the base for chicken noodle soup, risotto, or a simple pot of rice cooked in broth instead of water for extra flavor. It also works well in gravies, pan sauces, and braises where a splash of homemade broth adds depth that water can’t match. Some people sip it plain from a mug with a pinch of salt, especially in colder months, since a warm cup of savory broth can feel like a small reset partway through a busy day. However you use it, homemade chicken bone broth almost always outperforms the boxed version, since you control exactly what goes into the pot.
How to Store and Freeze Chicken Bone Broth
Chicken bone broth keeps in the refrigerator for 4 to 5 days once properly chilled and covered. For longer storage, portion it into jars, freezer bags, or silicone molds and freeze for up to three months. Leave an inch or two of headroom in rigid containers since liquid expands as it freezes. Freezing in small portions, like one-cup or muffin-tin sizes, makes it easy to pull out just what a recipe calls for instead of thawing a whole batch. Label each container with the date so older broth gets used first.
Once you have a stash of homemade chicken bone broth in the freezer, it becomes the easy upgrade for weeknight soups, risotto, braises, or a simple mug to sip when you want something warm and savory. The upfront time investment pays off every time you reach for a jar instead of a carton.